# Users - Patrol user management
# User settings
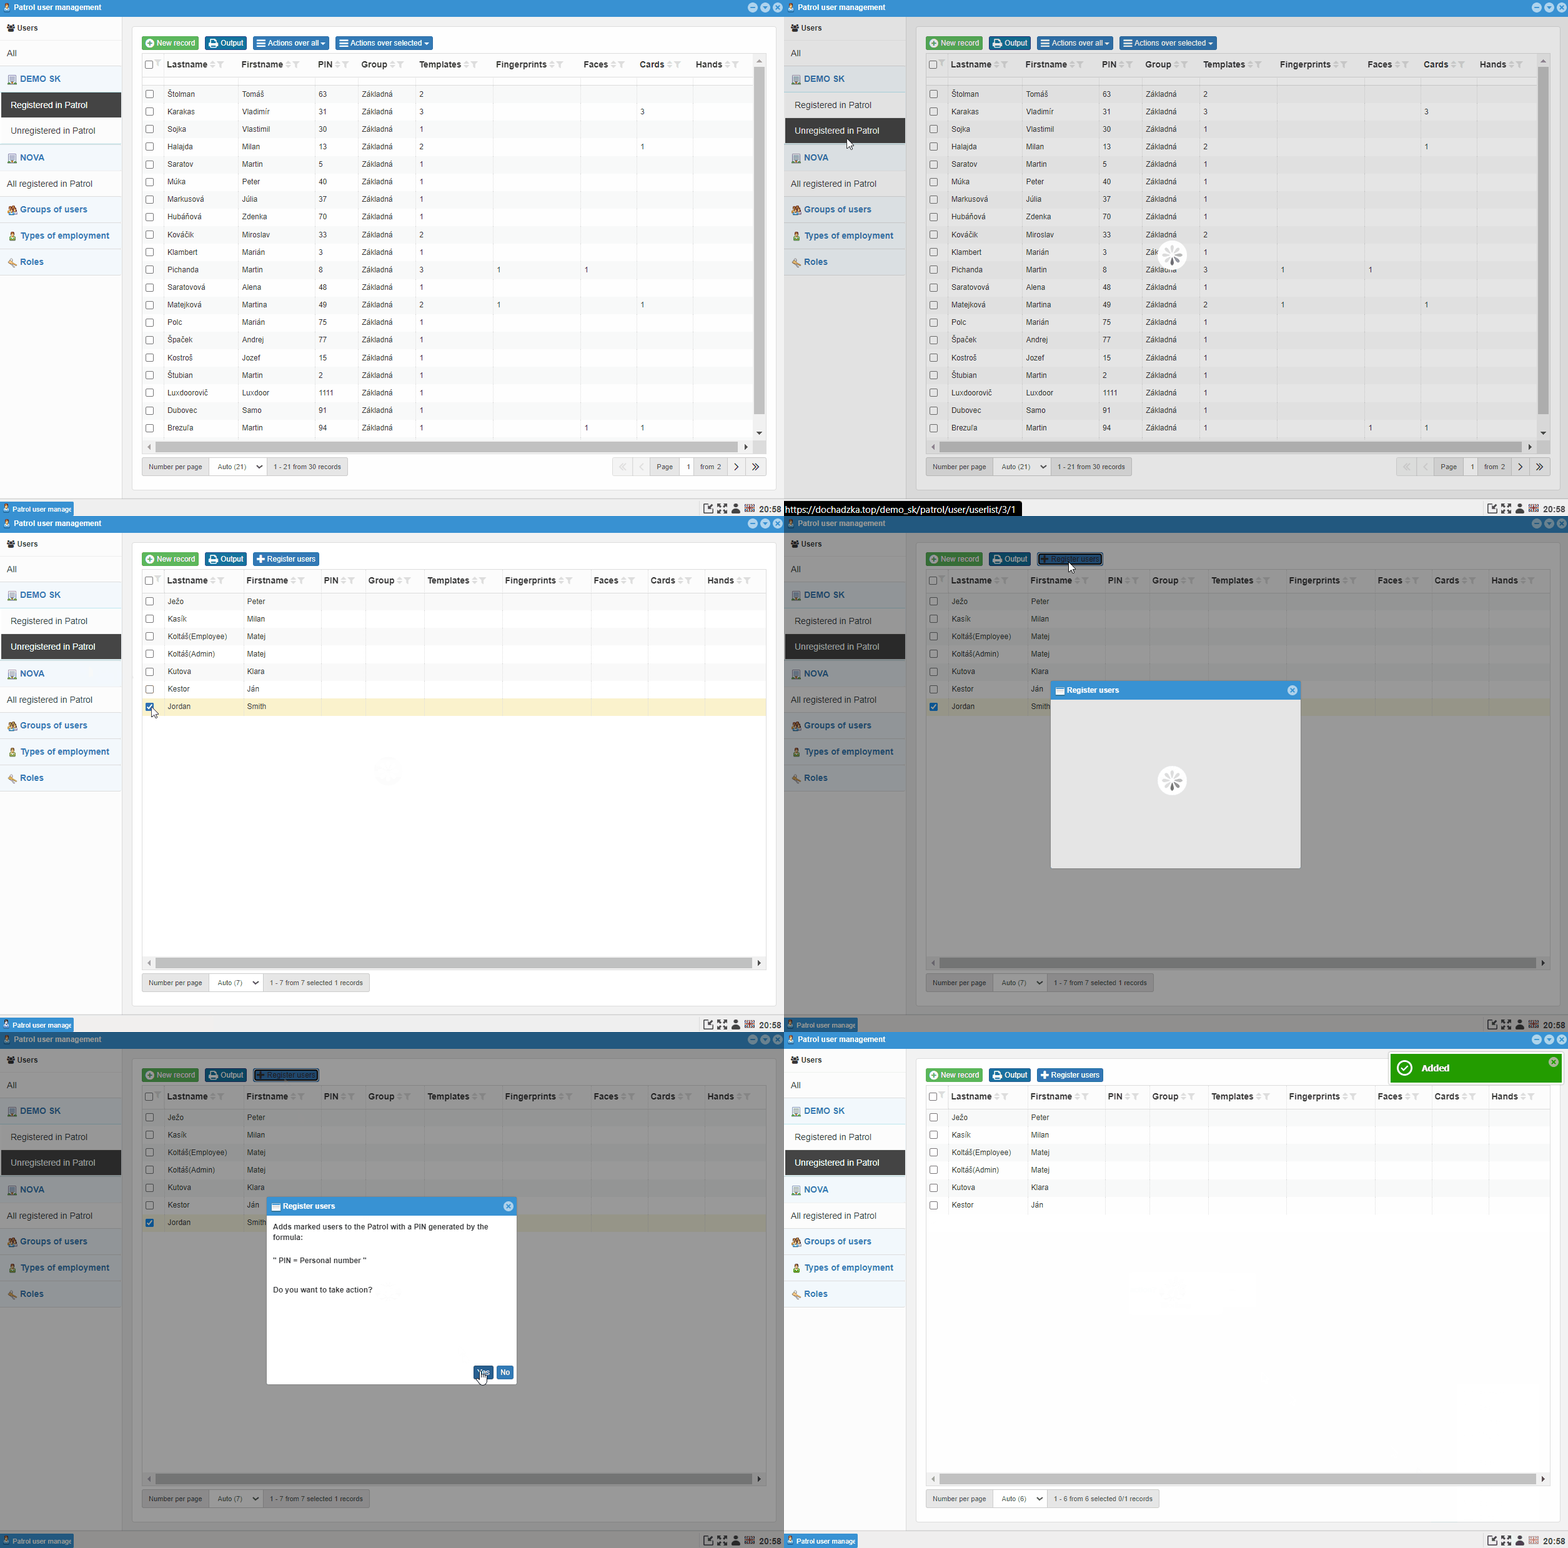
It is used for user registration. Their sampling, setting of their privileges of transitions (also in time intervals), access to readers. The options in the main part of the window change according to the use of the filter on the left side.
 |
|---|
# Filters
 |
|---|
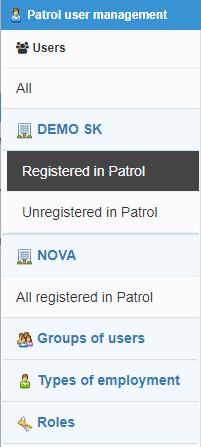
For a faster search, the filters also display various access and editing options:
All- unfiltered users, contains all system users (including system employees who were registered in webPatrol and then removed from webPatrol)Registered in Patrol- webPatrol users who are assigned a PIN linked to employees in the system in webPatrolUnregistered in Patrol- system employees who have never had a PIN created in webPatrolAll registered in Patrol- system users (i.e. also employees) who already have a PIN connection between the system and webPatrolGroups of users- displays according to the selected webPatrol user groupsTypes of employment- displays according to the selected System types of employmentRoles-displays according to the selected webPatrol role (privileges group)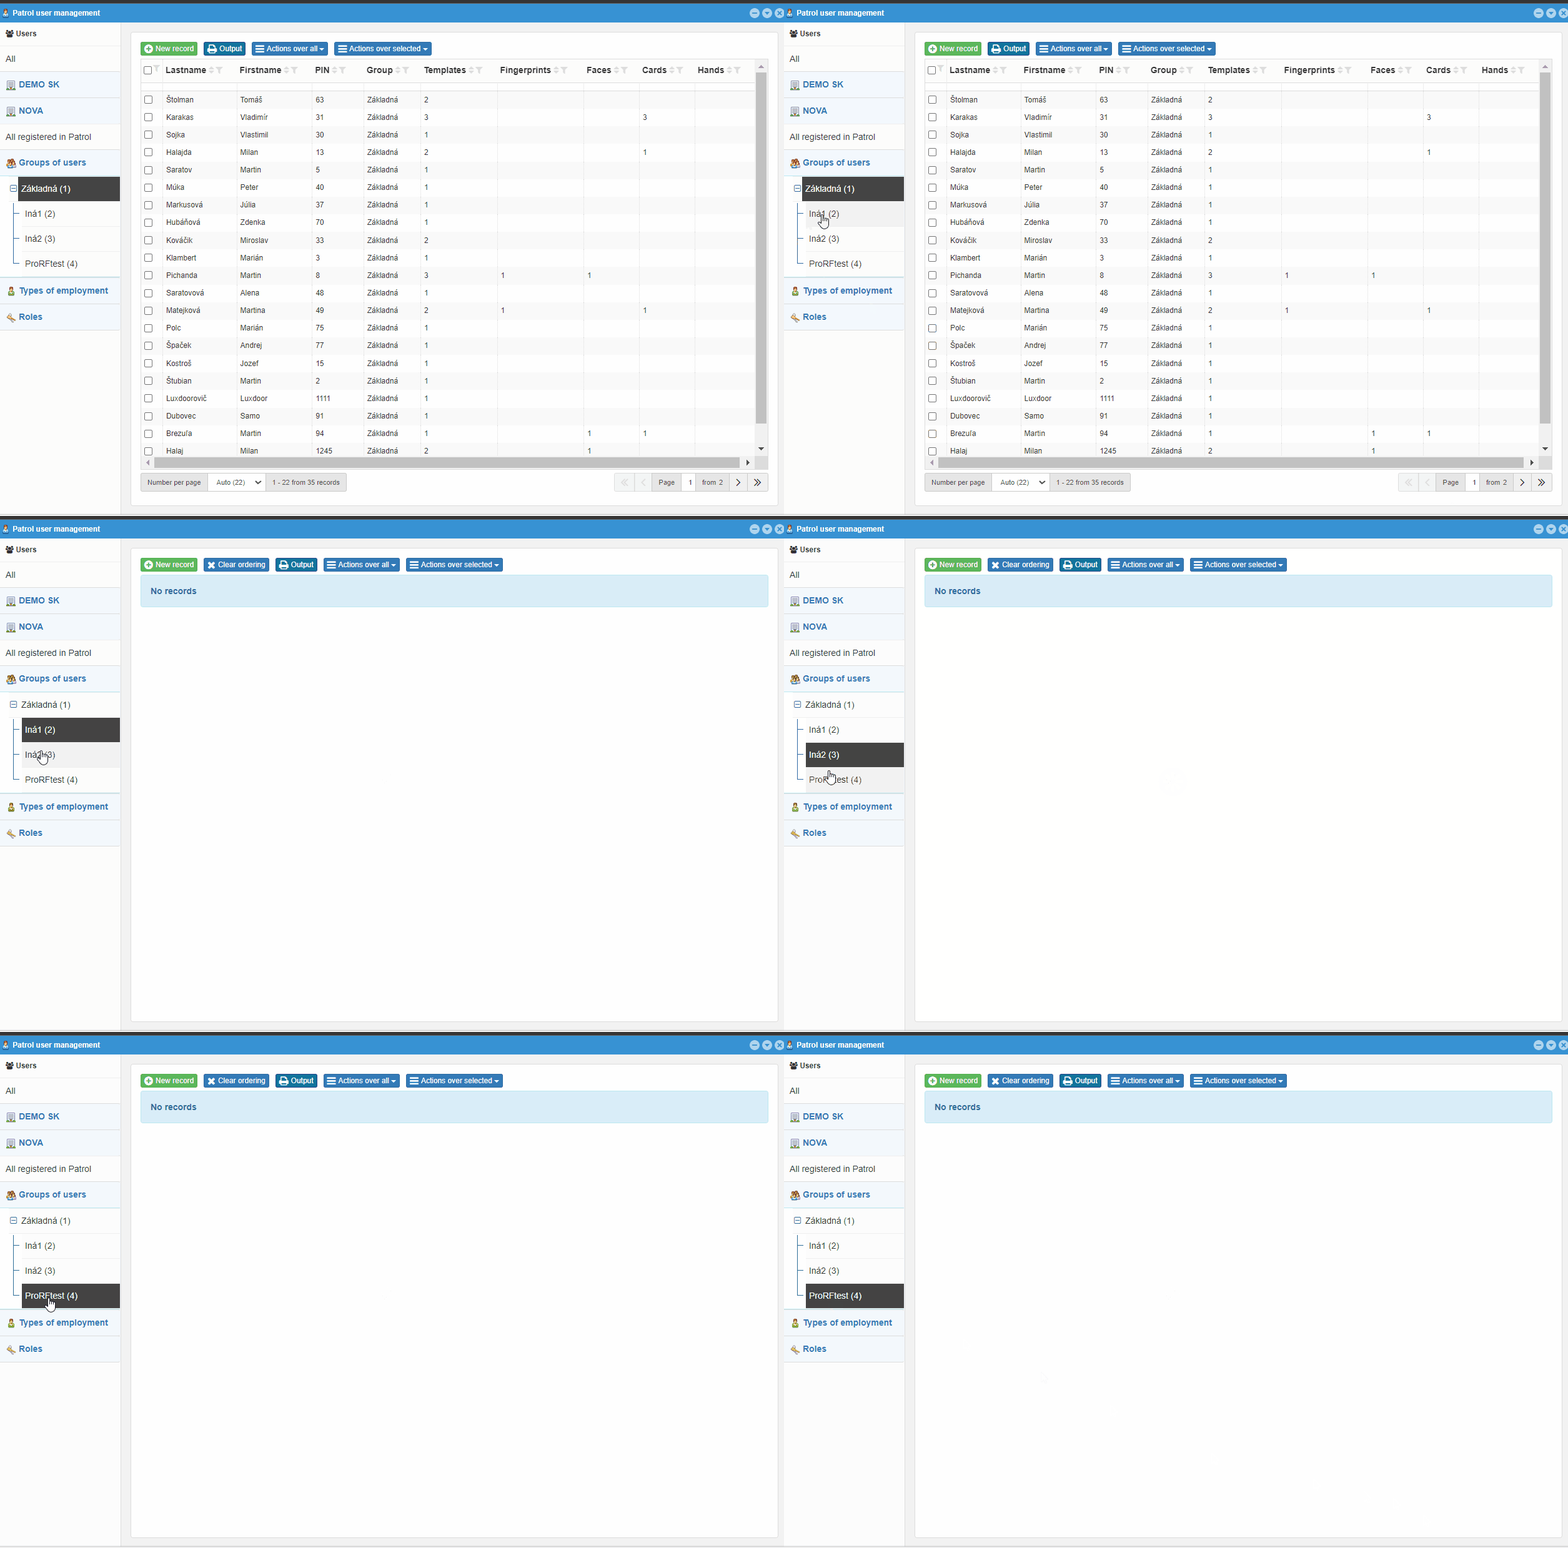
Note
The Clear sorting display is a bug, it appears for example if you have open the Unregistered in Patrol filtering and the content of the main part of the window is empty, clicking the button does not change anything (nor should it change)
# Options / Actions
# New record
When creating a new user record in webPatrol, there are several options:
- Creating a system user
- creating a system user and a system employee
using one of the modules:
SystemwebPatrol
After creating at least a system user, it is necessary to register the user in the webPatrol module by creating a PIN that connects the system user to the webPatrol user. The PIN is normally generated using the button Register users, which is located in the main part of the window when filtering unregistered users. If the user does not have an employment type or has more than one employment type, it is necessary to manually create a unique PIN. Furthermore, it is still necessary to assign a group to the user, with the help of which readers will be automatically assigned.
So it is advisable that you read System - users, System - employee, Creating an employee (webPatrol) before creating a new record.
Note
In the case of creating a new employee using webPatrol, he is initially selected with the letter X, which is automatically replaced by his personal number, after it is filled in and saved.
Warning
In this case, you need to have edit privileges:

User management Employee management
You can find on -> Access rights
# Output
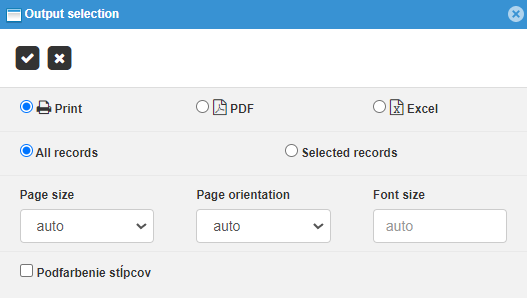
It serves to pre-set the printing of the current content of the main window.
# Actions over all/selected
Actions on users are intended for faster editing of user templates. The difference between Actions over all and Actions over selected is only that in the first case you edit all users at once and in the second case only users that you mark by clicking the box on the left side of their name.

# Copy templates
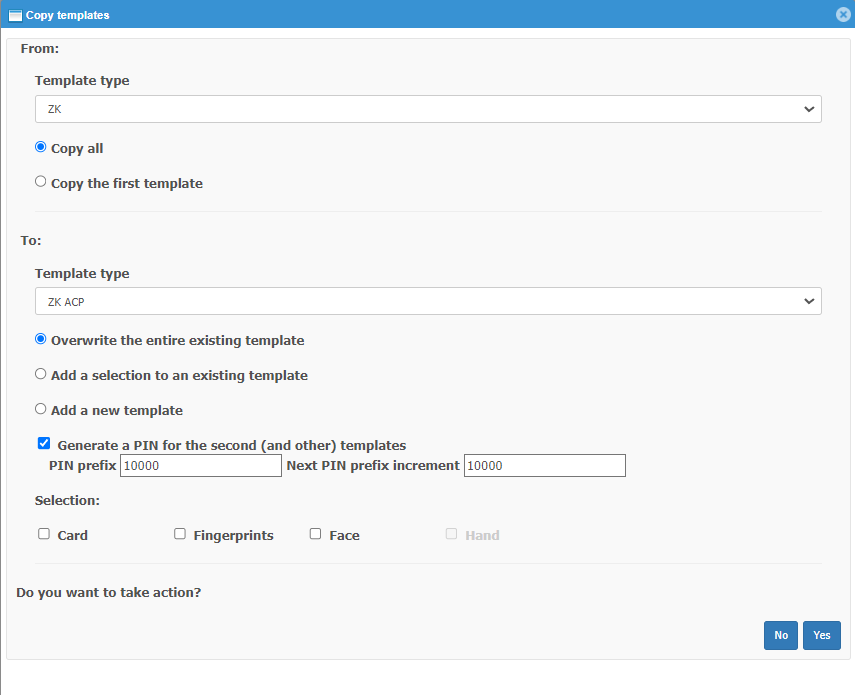
Copying templates is used if you have several types of readers and use them, for example the same card. After creating templates for one type of reader, you can copy them to another type of reader.
You choose here:
what type of template do you want to copy
- do you want to copy the first
- or all templates
what type of template do you want to convert the copy to
do you want to overwrite the entire existing template
or add the copied to the original templates
or add the copy as a new template
2.2.-2.3. 1. In the second and third cases, it is also necessary to select PIN generation
Then you still have to choose which templates you want to copy
- card templates
- fingerprints
- face
- hand
Note
Not all template types can be copied to and from all reader types
# Change group
With this, you can change to which user group the selected users will belong and thus which readers will be automatically assigned to them.

# Add finger to the reader Wizard
In case you want to do the given activity with more than one user, you have the name and PIN of the user you are editing at the top of the window. Marking a finger, then creating a finger template and clicking Yes as an answer to the question will record the changes and send them to the readers.
Warning
Add finger to the reader Wizard only works if the user you want to edit/change fingerprints for has already created, even only an empty template.
# Register users
In the table of unregistered users, users can be registered in several ways:
- By double-clicking on the user, filling in his PIN and sending the modified information to the server using the button

- By marking the users you want to register and the button
 *1
*1
- By agreeing to generate a PIN according to the employee's personal number

Note
*1 PIN generation is possible only if it is allowed in webPatrol settings, in that case, with normal settings, the PIN is generated according to the employee's personal number.
If the user does not have an employment relationship, it will not even be displayed among unregistered users, it will only be displayed in the All table.
# Editing a user template for a reader type
- Records of a system employee/user as a registered user in webPatrol from those not registered in webPatrol:
- Without generating a PIN: It is necessary to enter the user's PIN manually, it is advisable to create the same PIN as the employee's number
- With PIN generation: Register in the patrol
When editing a user record in webPatrol, or after registering a user in webPatrol, the Extended category opens.

# Extended
PIN- PIN is the registration number of the webPatrol userGroup- It is selected from the user group to which the readers are assigned
# Templates
It is used for the registration of different types of templates, for individual reader types
# New record / edit template for reader type
 |
|---|
# Basic
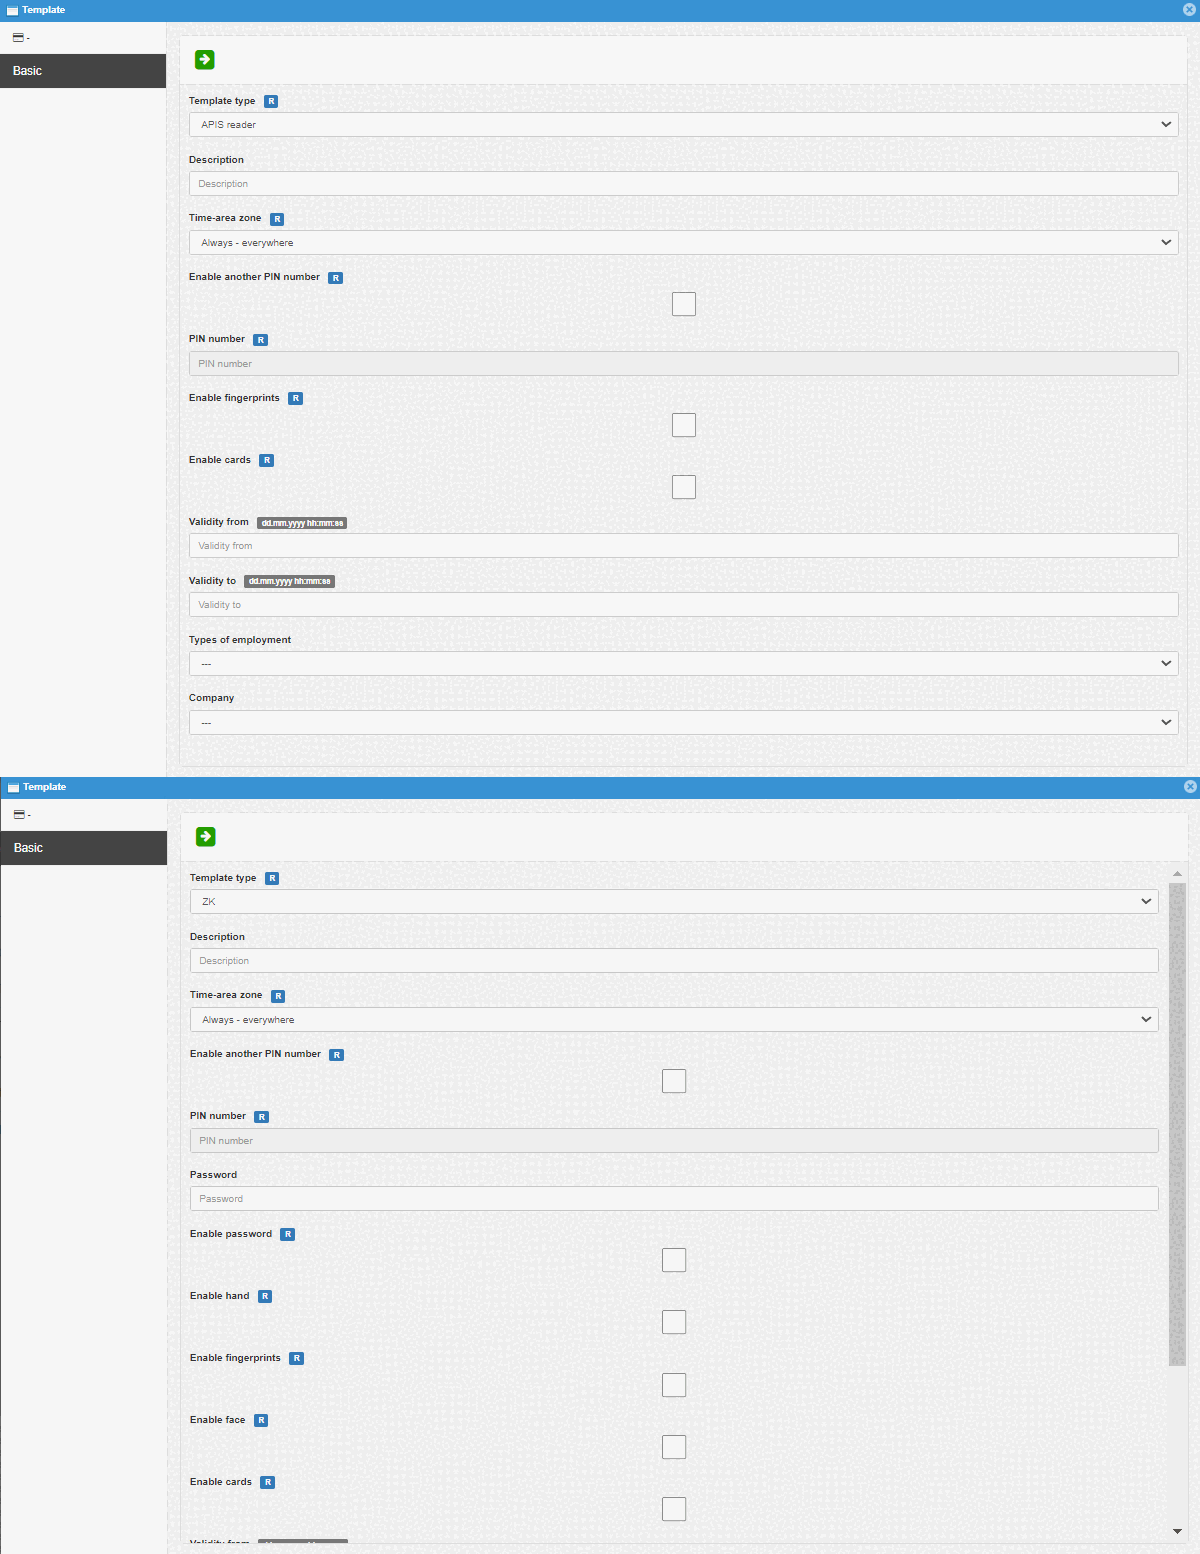
It is possible to create multiple templates of the same type of reader, as well as the same type of template (card, face, etc.). But in case templates of the same type of reader are assigned to one PIN, they should not contain templates of the same kind, because in that case they will be overwritten by the last template when synchronizing with the reader. If, for example, you want to have several cards for one user, under one employment type, it is necessary to create a new template of the same type of reader, with a different PIN (preferably with a common prefix, for all persons using several of the same types of templates), or register the same employee as a new user , with a different classification and a new PIN.
When creating a new record, it is necessary to correctly set the template for the reader type and only then the user template:
Template type-Selection from all types of readers Depending on the type of template, various options are also displayed. For example, ZK type readers can use card, face, hand templates. But it depends on the reader and template settings.Description- optional data (some browsers may try to suggest and auto-fill this)Time-area zone- choice between always and everywhere/never and nowhere; required for spatial readers, must be created in the webPatrol group settingsEnable another PIN number- it is used in the case of multiple cards/chips for one userPIN number- another PIN must be different from the user's main PIN, it is best to choose a suitable prefix for everyone, for better identificationPassword- only for S880Enable password- only for S880Enable hand- allowing the user to use the hand templateEnable fingerprints- allowing the user to use the fingerprint templateEnable face- allowing the user to use the face templateEnable cards- allowing the user to use the template cardValidity from- privileges for the user apply from the given periodValidity to- privileges for the user are valid until the given periodEmployment type- it is used if the user has several types of employment and if you want to assign several of the same types of templates for one jobCompany- it is used if the user has several types of employment and if you want to assign several of the same types of templates for one job
Note
After enabling different kinds of templates and sending the settings to the server using , various subcategories will be generated in which you can continue setting.
# Extended
After sending the first setup , or changes  , the Extended category is generated on the server, which contains more detailed settings divided by reader type. In this category you can:
Authority` - selection of privileges in the reader, usually user, administrator and super administrator; it differs according to the type of reader, it is related to the access to the menu and settings of the readerEnabled- enable / disable the use of user templatesVerification type- setting in which sequence it is necessary to verify in which wayBy access group- set in readersFP/PW/RFFPPINPWRFFP/PWFP/RFPW/RFPIN & FPFP & PWFP & RFPW & RFFP & PW & RFPIN & FP & PWFP & RF / PINFACEFACE & FPFACE & PWFACE & RFFACE & FP & RFFACE & FP & PWVEIN- reservedFP & VEIN- reservedVEIN & RF- reservedVEIN & PW & RF- reservedPALMPLAM & RFPALM & FACEPALM & FPPALM & FP & FACEOTHER- reserved
Creating photos after verification- setting after which verification the photo should also be created; Only for reader type APIS ReaderAccording to the system- according to the reader settingEnabled- alwaysCARDFPPINCARD or PINCARD or FPFP or PINCARD or FP or PINDisabled- never
After sending the first extended setup again , or extended settings changes to the server, categories of allowed template types will be generated.
Description
FP - fingerprint
PW - password
RF or CARD - card
PIN - personal identification number
FACE - face
VEIN - vein
PALM - palm
OTHER - other
& - and
/ or or - or
Note
In the case of the ZK - iClock S880 type reader, it is also possible to log in using:
- Password
- PIN In both cases, a new template type is not generated, it is set in the basic template settings of the reader type.
# Creating, editing and deleting templates according to the type of template
Only one template of the same type can be created in one template of a reader type at a time. For example, before changing the card, it is necessary to delete the template card first. For finger templates, they can be replaced directly.
- Hand: To insert a hand template on the server, it is necessary to use the import of templates from the ZK - ProFace and SpeedFace reader
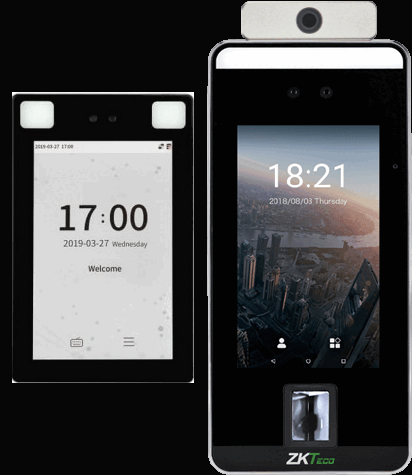
- Face: To insert a face template, it is necessary to use the import of templates from the ZK type reader - ProFace and SpeedFace
- Fingerprint: To insert a fingerprint template, it is necessary to use the import of templates from an ApisReader type reader, or to use the ZK9500 reader, which requires installation by a software technician.
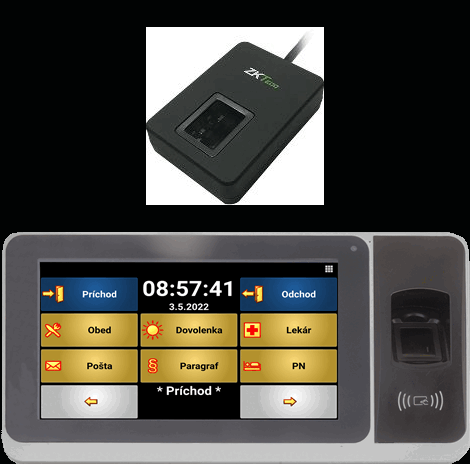
- Card: To insert a card template, it is possible to import templates from a ZK type reader - ProFace, SpeedFace, ApisReader type readers - Zpad, Biopad, or use a CR20 reader
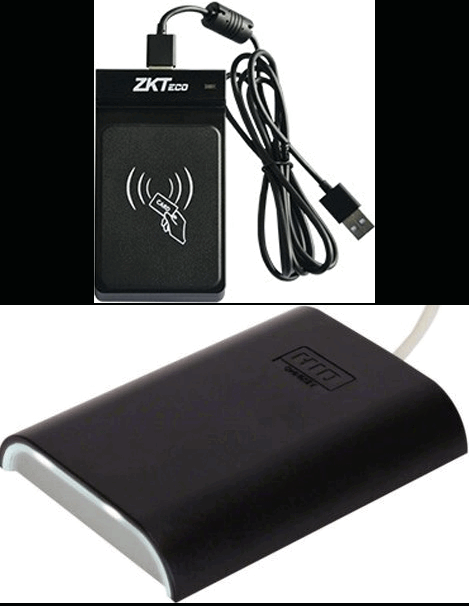
Note
Since it is possible to copy templates from one type of reader to another, this step is always added to the procedures, but it is not required and not all options are possible at this moment (e.g. we do not use other readers for face, palm verification, such as ProFace/SpeedFace)
# Hand/Palm and Face
To create a hand and face template, administrator privilege is required on readers of the ZK type, ProFace/SpeedFace type. In this case, the administrator can access the reader menu and edit user templates. There are several ways to proceed:
- From the server
- creation of an empty user template of type ZK
- synchronization with ZK type reader, ProFace/SpeedFace type
- creating a palm and/or face pattern
- loading users from the reader
- importing user templates by overwriting the original ones on the server
- synchronization of user templates to other readers
- From the reader
- creating a user on the reader
- creation of user templates on the reader
- loading users from the reader
- importing user templates by creating a new one/overwriting the original employee on the server
- copying a template from one type of reader to another
- synchronization of user templates to other readers
# Fingerprint
To create a fingerprint template, it is possible to use a fingerprint reader or a reader with a fingerprint reader (ApisReader, or ProFace/SpeedFace, with a fingerprint reader). There are also more options than creating templates.
- From the server through the fingerprint reader
- creating a user template of the ApisReader/ZK type
- creating a blank fingerprint template
- creating a fingerprint template using a fingerprint reader
- copying a fingerprint template to another type of reader
- synchronization of user templates to other readers
- From the server through the reader
- creation of an empty user template of type ApisReader/ZK
- synchronization with an ApisReader type reader, or ZK with a ProFace/SpeedFace type
- creating a fingerprint template
- loading users from the reader
- importing user templates by overwriting the original ones on the server
- copying a template from one type of reader to another
- synchronization of user templates to other readers
- From the reader
- creating a user on the reader
- creation of user templates on the reader
- loading users from the reader
- importing user templates by creating a new one/overwriting the original employee on the server
- copying a template from one type of reader to another
- synchronization of user templates to other readers
# Card
Under normal circumstances, the customer buys a larger number of cards, and this involves loading the cards onto the server by a software technician. In that case, it is enough:
- assign a card to an employee
- copy templates to another type of readers
- synchronize with readers Otherwise, the card needs to be loaded and saved on the server. Loading cards can also be done in different ways:
- From the server through the card reader
- creation of a user template of the Apis Reader/SK type
- creating a blank template card
- creating a template card using a simple reader
- loading the card number into the selected part of the window (you must have an English keyboard or a keyboard that has priority numbers in the line above letters)
- manual addition of the card's external number
- copying the card template to another type of reader
- synchronization of user templates to other readers
- From the server through the reader
- creation of an empty user template of type ApisReader/ZK
- synchronization with an ApisReader type reader, or ZK with a ProFace/SpeedFace type
- creating a template card
- loading users from the reader
- importing user templates by overwriting the original ones on the server
- copying a template from one type of reader to another
- synchronizácia užívateľských vzoriek na ostatné snímače
- From the reader
- creating a user on the reader
- creation of user templates on the reader
- loading users from the reader
- importing user templates by creating a new one/overwriting the original employee on the server
- copying a template from one type of reader to another
- synchronization of user templates to other readers
- From the server using the ApisReader manually
- creating a user template of the ApisReader type
- creating a blank template card
- reading the card's internal number from the reader by placing the card on the reader and writing down the displayed, read, unrecognized card number in the decimal system
- filling the empty card template with the read value to Internal card's number according reader's type
- filling in the external card number
- copying a template from one type of reader to another
- synchronization of user templates to other readers
# Delete selected
Deletes selected user templates of the selected reader type
# Readers
It serves to synchronize the user's templates from the server to the readers. readers are automatically displayed here according to the group to which you assigned the user template. If the group does not contain a reader, the reader must be assigned, otherwise it will not be possible to send templates to any of your readers and the user will therefore not be able to authenticate.
# Assign the readers
After clicking on the option Assign readers, a window will open in which you can mark all the readers on which you want the user to be able to authenticate, in case the user has created templates of the given type of reader. Then click on Assign selected.
# Delete selected
Removes the selected readers from the readers assigned to the user.
# Synchronize changed/selected
Replaces/creates templates from server on readers.
# Delete from selected
Deletes user templates from selected readers.