# Settings
It is used to configure the webPatrol module. Setting up authorization groups, reader keys, reader screens, creating time zones and other settings related to the webPatrol module.
# Common settings
# Parameters
In the Parameters subcategory, it is possible to set PIN generation, Deleting users, Sensor action information windows.
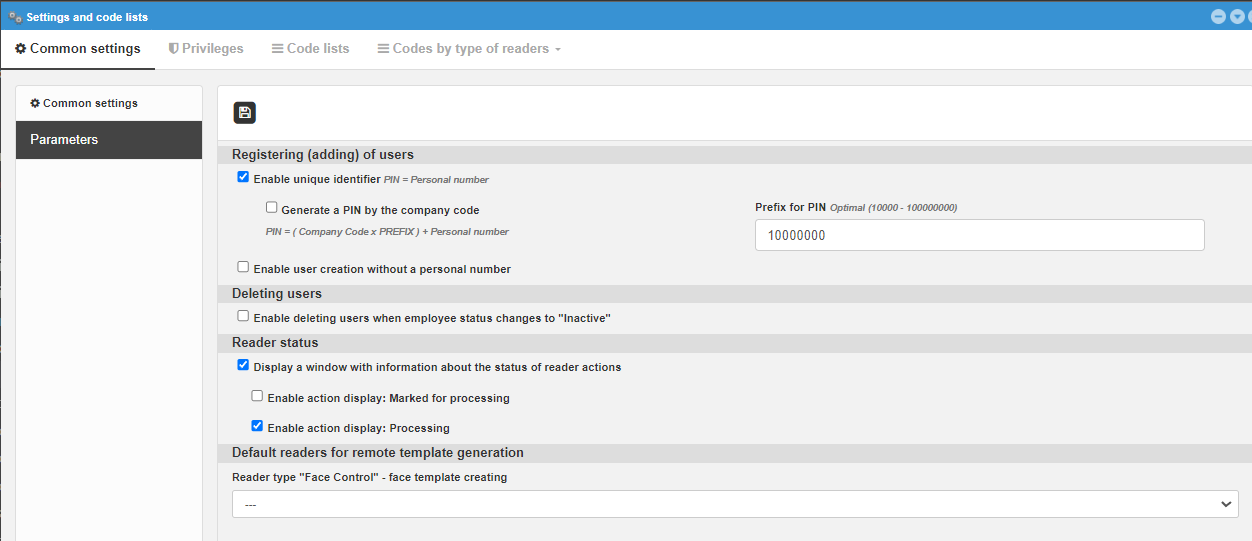
Registering (adding) of usersEnable unique identifier (PIN = Personal number)- when registering an employee, it is necessary to create his PIN, to simplify this step, it is possible to generate a PIN in the table Unregistered in Patrol by the designated employee with the help of a button, but only if this option is enabled. It generates a PIN according to the employee's personal number from the table
  Employees. More on this topic in Register users
Generate a PIN by the company code (PIN = (PIN = ( Company Code x PREFIX ) + Personal number)- generates a PIN according to the company code, multiplies it by the entered prefix and adds the value of the personal number *1Prefix for PIN Optimal (10000 - 100000000)*2Enable user creation without a personal number- used when importing users from reader*3
Deleting usersEnable deleting users when employee status changes to "Inactive"- in case you mark in employee as inactive + delete from modules, it is automatically removed from webPatrol and also from readers
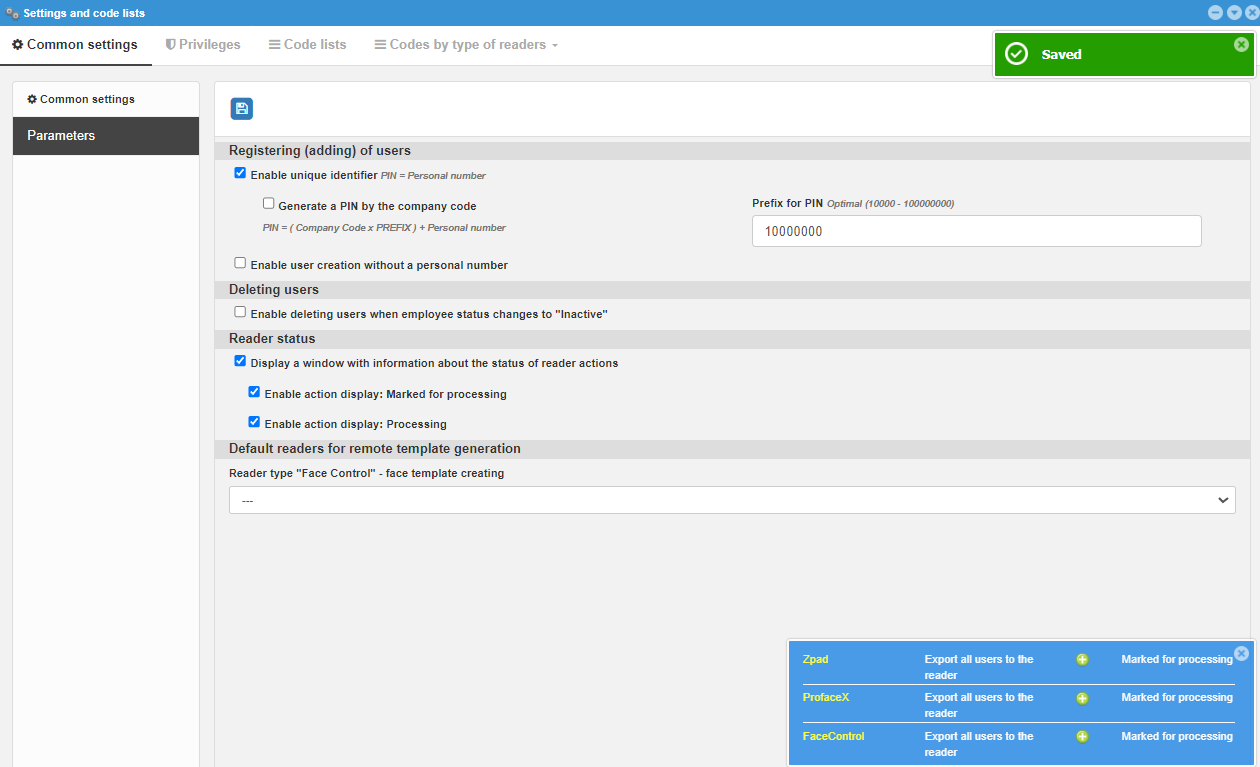
Reader statusDisplay a window with information about the status of reader actions- the lower right side of the window displays information about actionsEnable action display: Marked for processing- actions that are not yet processed but are ready to be sent to the reader are also displayedEnable action display: Processing- the actions that are currently taking place are displayed
Note
*1 - at the moment it is possible to have only one company per webbox
*2 - currently not supported, only works with 10000000
*3 - If it is enabled, when importing users from the reader, it is possible to create a user without registration as an employee. If it is not allowed, when importing users from the reader, it is not possible to create a user if he should not also be registered as an employee.
# Privileges
# Roles
It is used to create additional privileges groups to existing ones.
- Administrator
- User
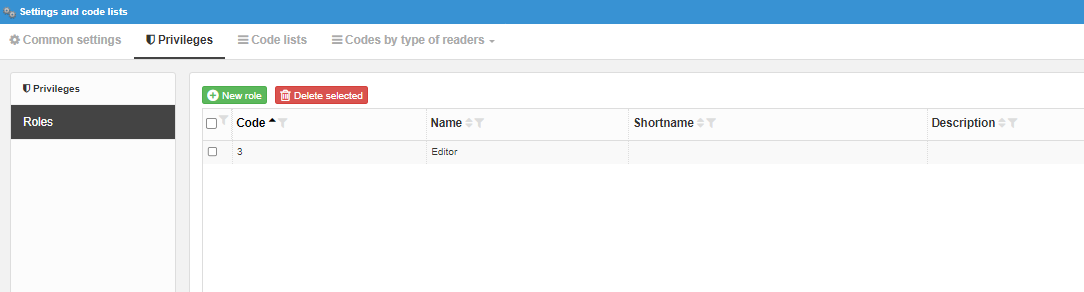
When selecting privileges options, if you select the parent of a part of the privilege tree, the group automatically receives the privileges of all children. The privileges options are:
- Readers management
- Adding readers
- Deleting readers
- Editing readers
- Editing readers - main settings
- Editing readers - import users
- Editing readers - deleting users
- Readers synchronization
- Readers update
- User management
- Adding users
- Deleting users
- Editing users
- Editing users - main settings
- Editing users - template management
- Editing users - reader management
- Wizards management
- Creating fingerprints
- Deleting fingerprints
- Current presence management
- Transaction management
- Pending readers actions management
- Readers group management
- User group management
- Settings management
- Common settings
- Privileges
- Code lists
- Codes by type of readers
- Card type management
- Adding card types
- Deleting card types
- Editing card types
# Code lists
# Time zones
It is used to record the global time zones through which you will refer in user settings for time zone settings according to reader types. At the moment it is only used for ZK ACP. You will find out more in Codes by type of readers and in Time-area zone and time zone by reader type.
# Code lists by type of readers
The following settings are used only when working with a given type of reader.
# Type readers APIS reader
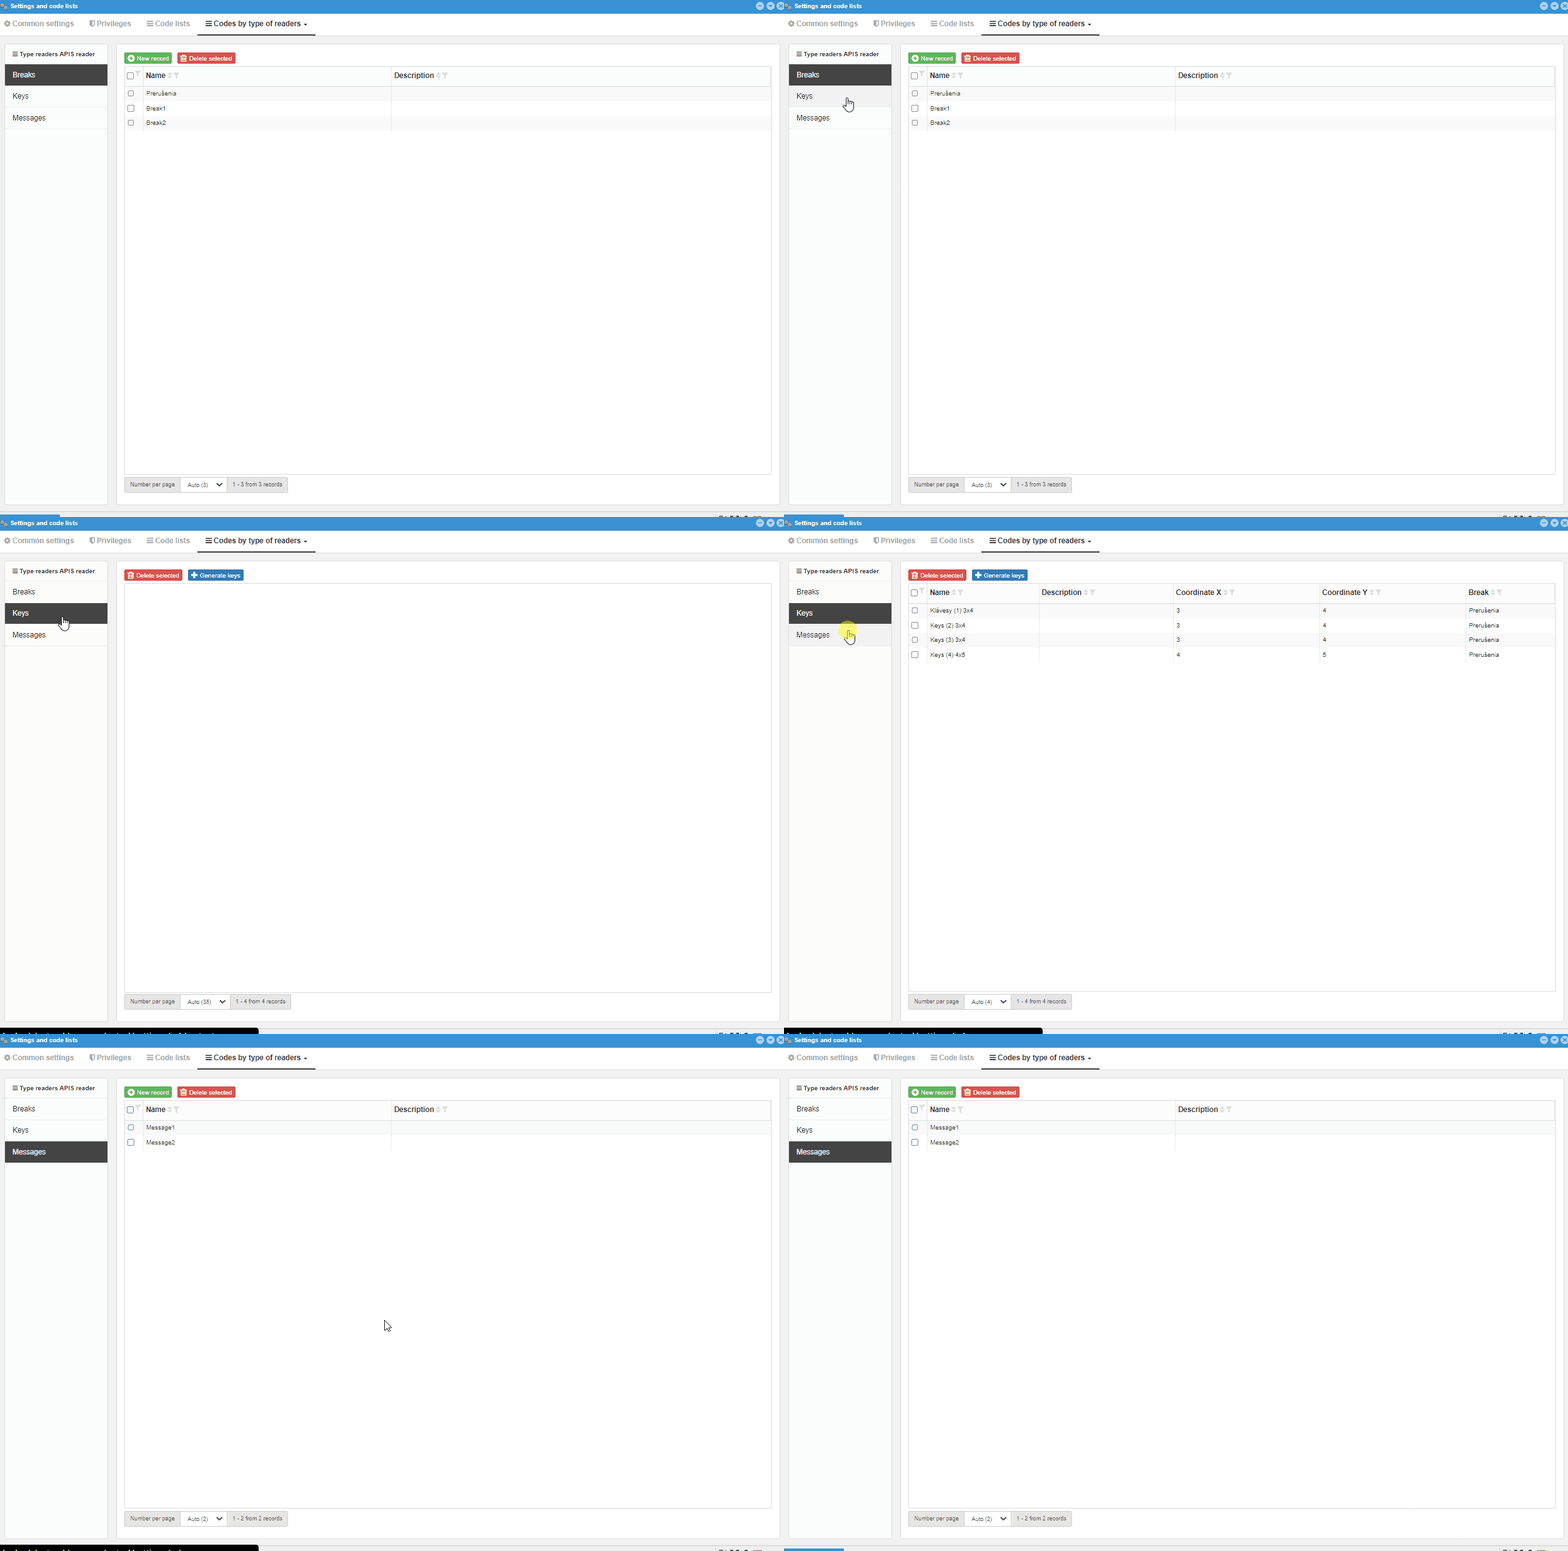
# Breaks
Setting all breaks used for this type of reader after synchronization. Different breaks can be set for multiple Apis reader readers.
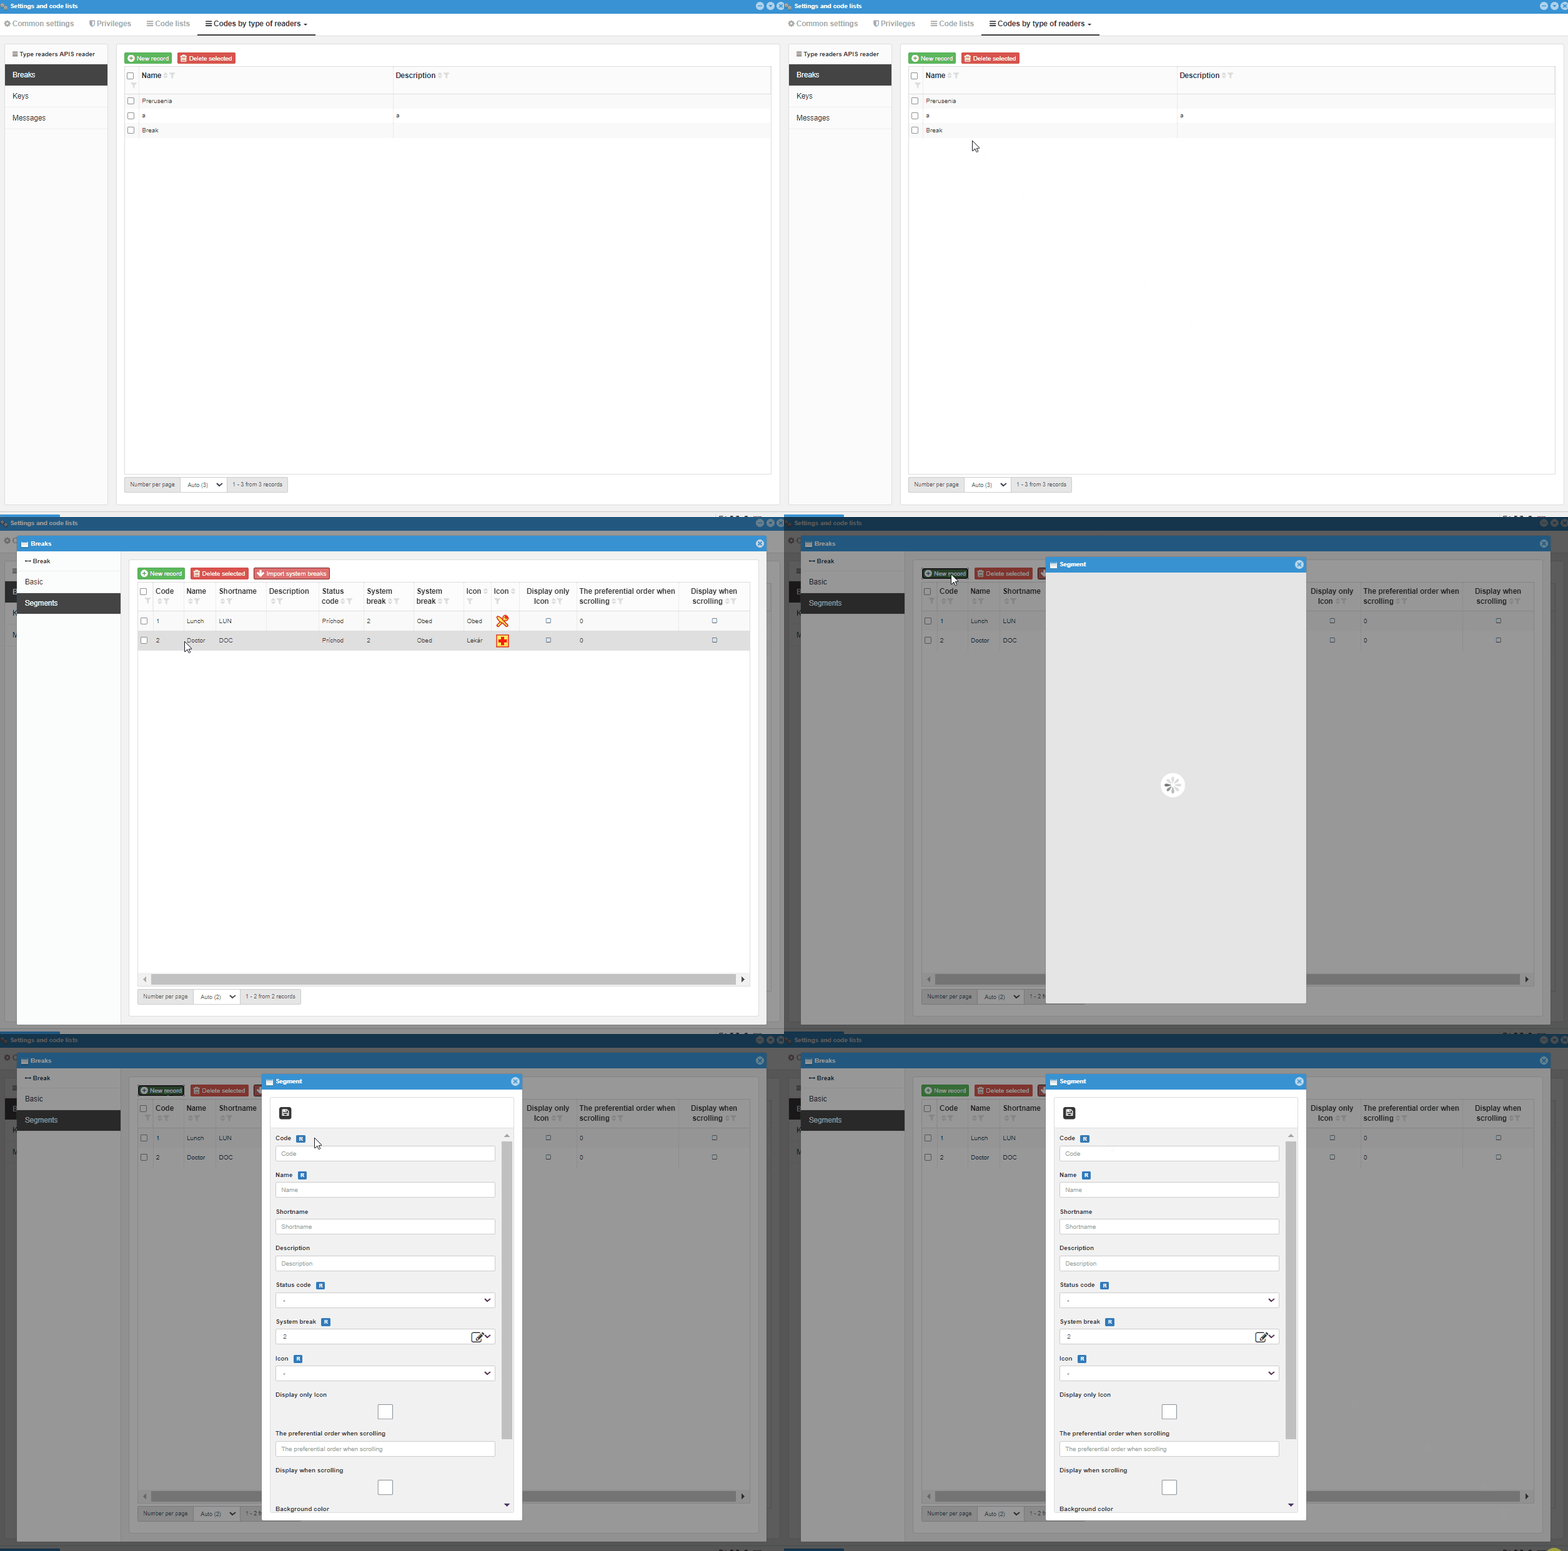
# Basic
The screen allows you to name the break setting per reader so that the settings can be distinguished in the case of multiple readers. When creating the break code list, the Name data is required and must be filled in. The description serves to supplement the naming.
NameDescription
# Segments
When creating an break code, it is important to add breaks and adjust their settings. Since the break settings in webPatrol are tied to system breaks , there is an option to import them from System Breaks.
Working with the breaks code:
New record- Creating a new break, or settings assigned for system breakDelete selectedImport system breaks- creation of break settings links for all system breaks *1
Warning
*1 Post-import settings for each break will be basic
# Breaks segment - Break
Each break, like a segment, has its own settings:
CodeNameShortnameDescriptionSystem break- linking the break settings in webPatrol with the system breakIcon- icon that will be displayed next to the break nameDisplay only Icon- if checked, the name will not be displayed, only the iconThe preferential order when scrolling:- If each break is set to 0, then they are displayed according to the one created earlier - if each break is zero, they are displayed from the first created to the last
- If each break is set to a value other than 0 and the values are different between breaks, they will be sorted from smallest to largest
- If breaks are set with both 0 and other values, then those from 1 above are displayed first, sorted in ascending order, and then all with a value of 0, sorted according to their creation
Display when scrolling- they may exist, but will not be displayed when scrolling the menuBackground colorText color
# Keys
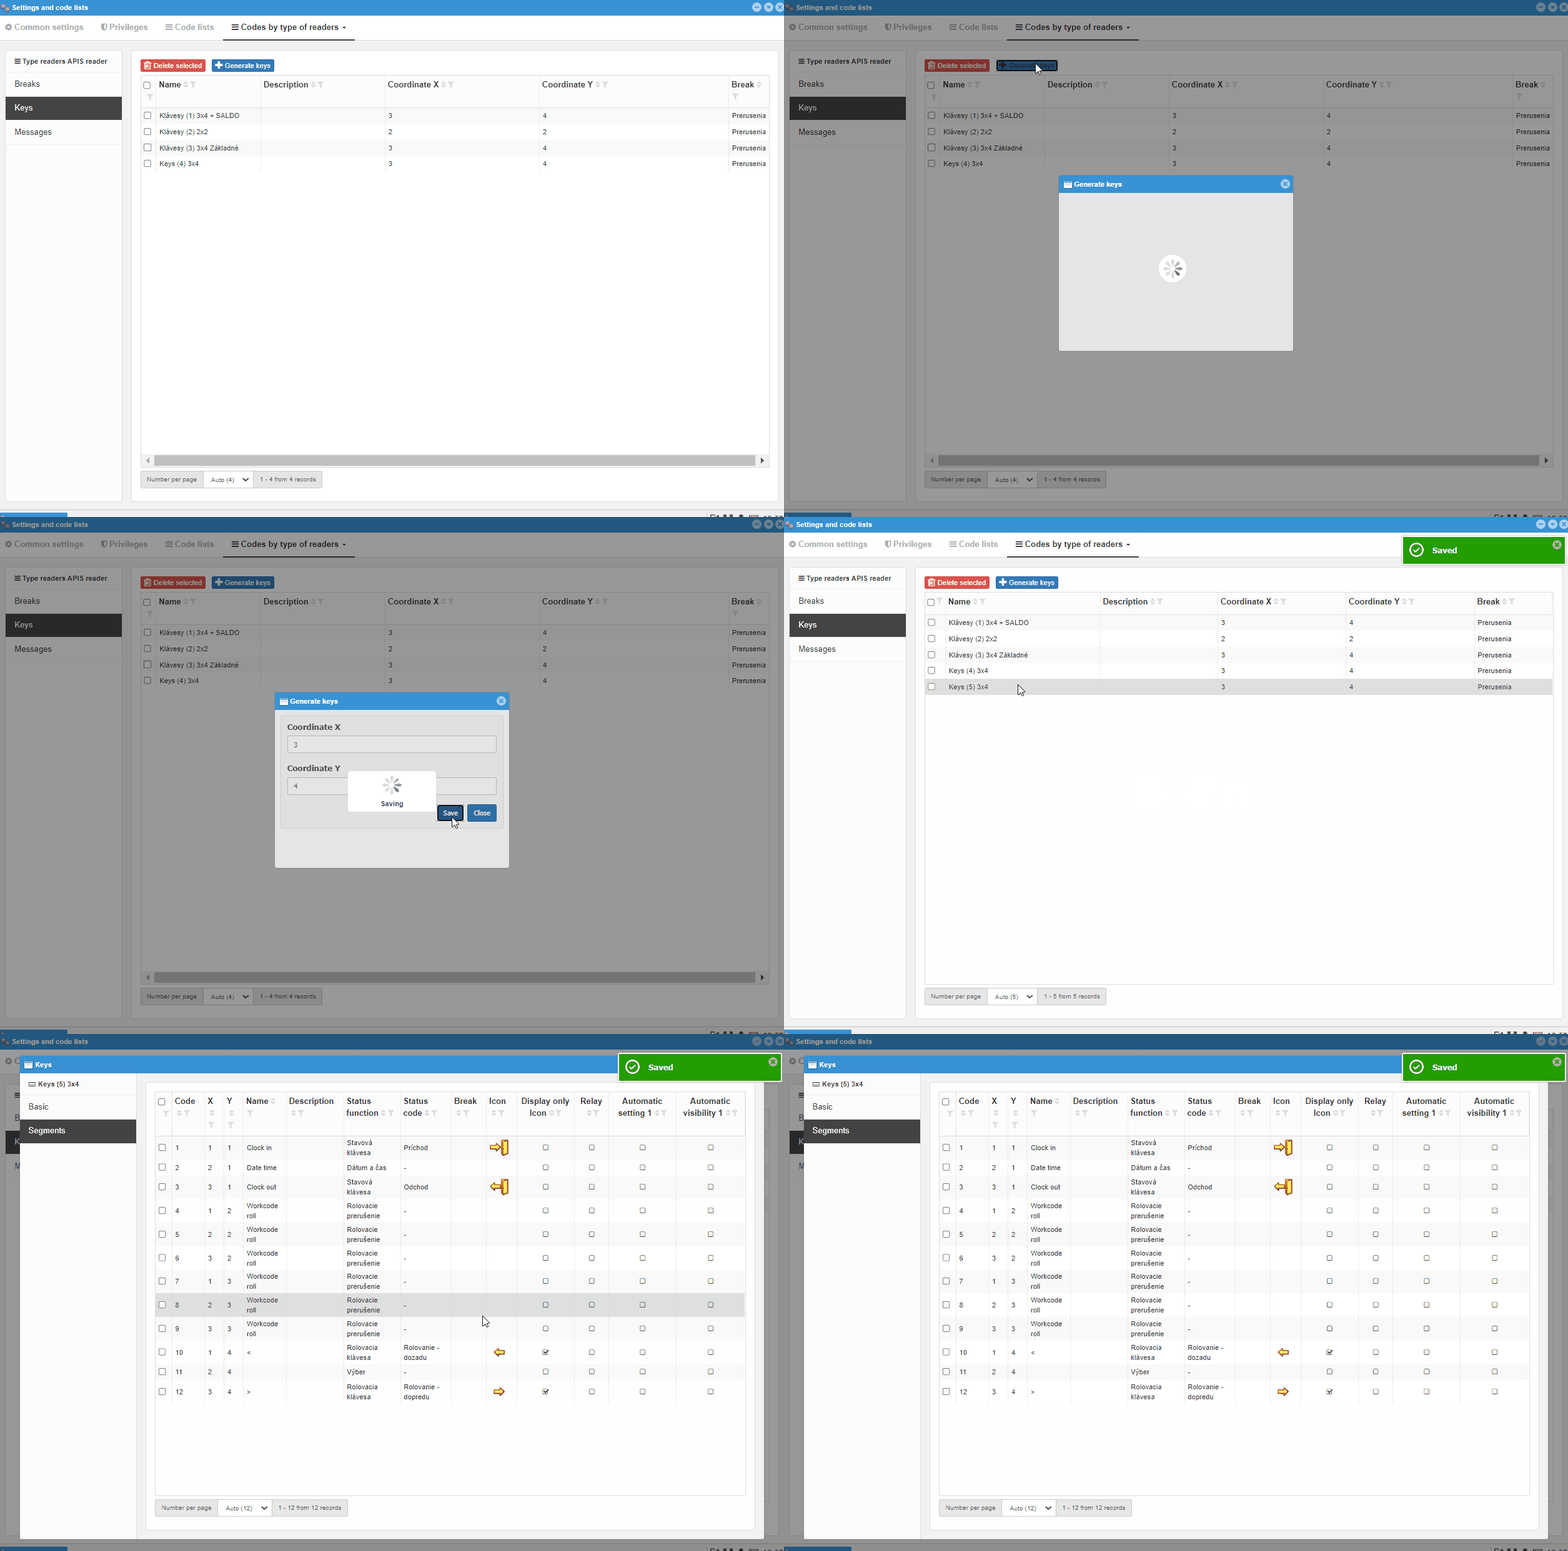
The menu of readers of this type is set using the keys to be displayed on its screen. Using the keys, the employee chooses which transaction to send to the server from the reader. In the case of different key settings for several readers, it is necessary to set the keys for each reader separately.
Delete selectedGenerate keys- the default is 3x4 generation, the setting allows you to generate the key layout according to your choice*1. The generated layout cannot be changed, only by regenerating it.
Note
*1 the text in the keys is set according to the size of the key, for example in the case of 10x10, the time would not be visible even if icons were rendered without text
# Basic
The screen allows you to name and set the keys to the reader. In the basic settings of the keys, it is possible to set:
NameDescriptionCoordinate X- cannot be modified, it can only be set during generationCoordinate Y- cannot be modified, it can only be set during generationBreak- with which code of breaks they will be associated
# Segments
As in the break code, here too the code needs to be filled. The basic settings are automatically pre-populated when the keymap is generated.
# Key segment - key
Each key has additional settings:
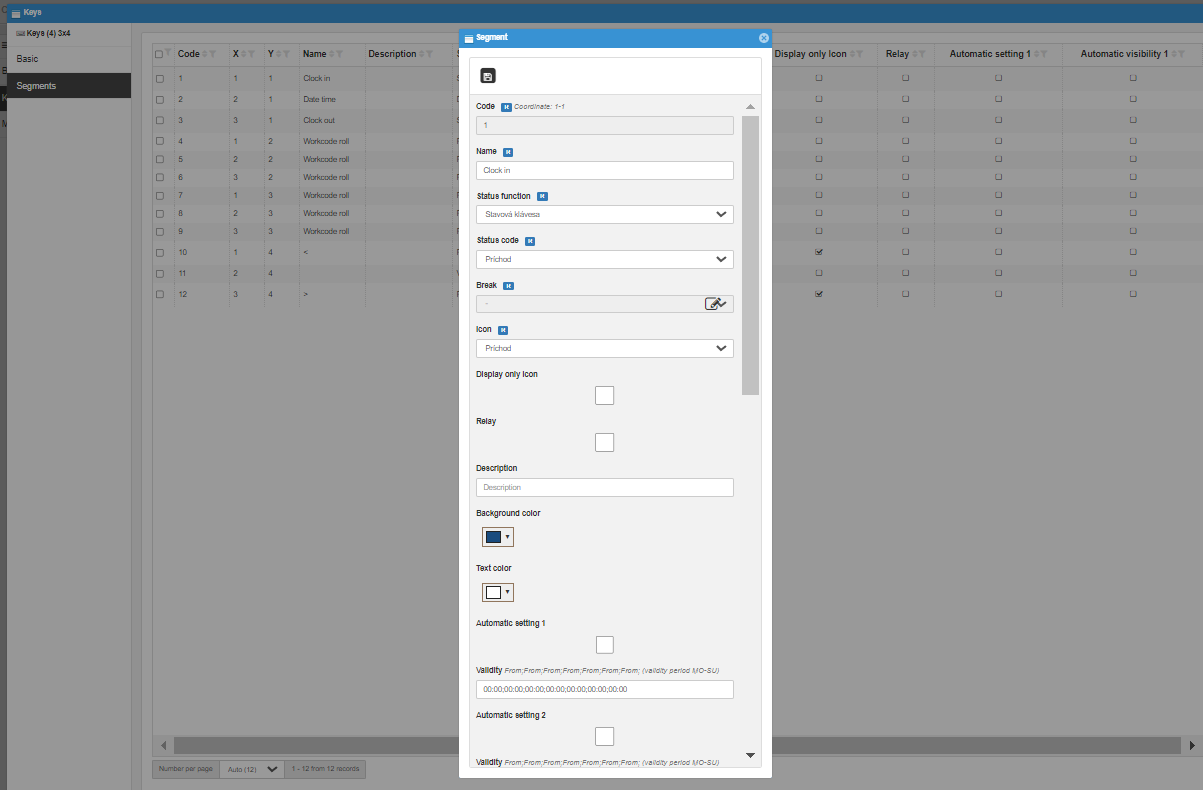
CodeNameStatus function- some other settings can only be used in some of the optionsUndefined- empty boxStatus key- it is possible to choose from the options in the Status code, it sends the code according to the status code setting (e.g. arrival) and possibly also the selection of break (after marking departure, marking lunch)Work code (break)- can be selected from the options in Status code and Interruption, always sends the given status code with the given break if setScroll break- displays the break from the break code list assigned to the keys
- varies according to break settings - preferred scrolling order, number of free spaces per page, page that is loaded
- used in conjunction with the status key
Scroll key- zdisplays the scroll back or scroll forward key, depending on the Status Code settingDate and timeSelection- displays the currently selected option by the user or by automatic settingMessage- general report for all employeesHTML link- opens the HTML link
Status code- only possible with some status functionsIn case of setting Status function - Status keyCheck in- defaults the next transaction as incoming, waiting for validation, or flagged as abort and validationCheck out- defaults the following transaction as exiting, waiting for validation, or marking abort and validationStart of action- presets the next transaction as the start of the action, must select the action (saved as a break)End of action- presets the next transaction as the end of the action, must select the action (saved as a break)Pass IN- after verification, the pass in transaction is sentPass OUT- after verification, the pass out transaction is sentPatrol- reservedFood - ordering- sending the orderFood - canceling- reservedFood - putting in the bourse- reservedFood - selecting from the bourse- reservedFood - dispensing- dispense of the orderBalance- displays the balance of the employeeFund- displays the employee fundHoliday- displays the employee's holiday balanceUser message 1User message 2User message 3All user messagesFood - verified- reserved
In case of setting Status function - Work code (break)Check in- sends arrival to work or arrival from break, if assigned - it is necessary to select the break with which the arrival will be associatedCheck out- it is necessary to select the break with which the departure will be associatedStart of action- necessary break selectionEnd of action- necessary break selectionFood - ordering- after selecting the order and verifying the user, the order is sentFood - canceling- reservedFood - putting in the bourse- reservedFood - selecting from the bourse- reservedFood - dispensing- dispense of the actual orderPatrol- reserved
In case of setting Status function - Scroll keyScrolling - backwards- opens the next page of Scroll Break optionsScrolling - forward- opens the previous page of Scroll Break options
Break- it is selected from the break code pointed to by the setting in the Basic section. It can only be set if the Status function "Work code (break)" is set and thus linked to Arrival/DepartureIcon- option to choose the icon that will be represented by the keyDisplay only IconRelay- if connected, it unlocks the door after verificationDescriptionBackground colorText colorAutomatic setting 1 to 3- if it is checked, it automatically presets (displayed in the status function Selection and sent during verification) according to the validity settingsValidity- It is set at what time it should be applied, on Mon-Sun
Automatic visibility 1 to 3- if it is checked automatically in the specified time period, the key can be used, otherwise notValidity from- setting the date from (if not set, it always applies)Validity to- setting the date to (if not set, it always applies)Validity- It is set at what time it should be applied, on Mon-Sun
HTML link (URL)Show HTML link only after successful verificationHTML page display time in s. (if it is 0, the HTML page is displayed continuously)
Note
Without setting auto-set, the Status function has Selection selected until the user selects something else (selection only remains for a certain amount of time, after which it reverts).
Example
*1 The basic key setting contains Arrival on the upper left, it is a status key with the code Arrival and after pressing it, the user has the option to choose from the breaks below
# Messages
Setting the messages that will be displayed to each user.
New recordDelete selected
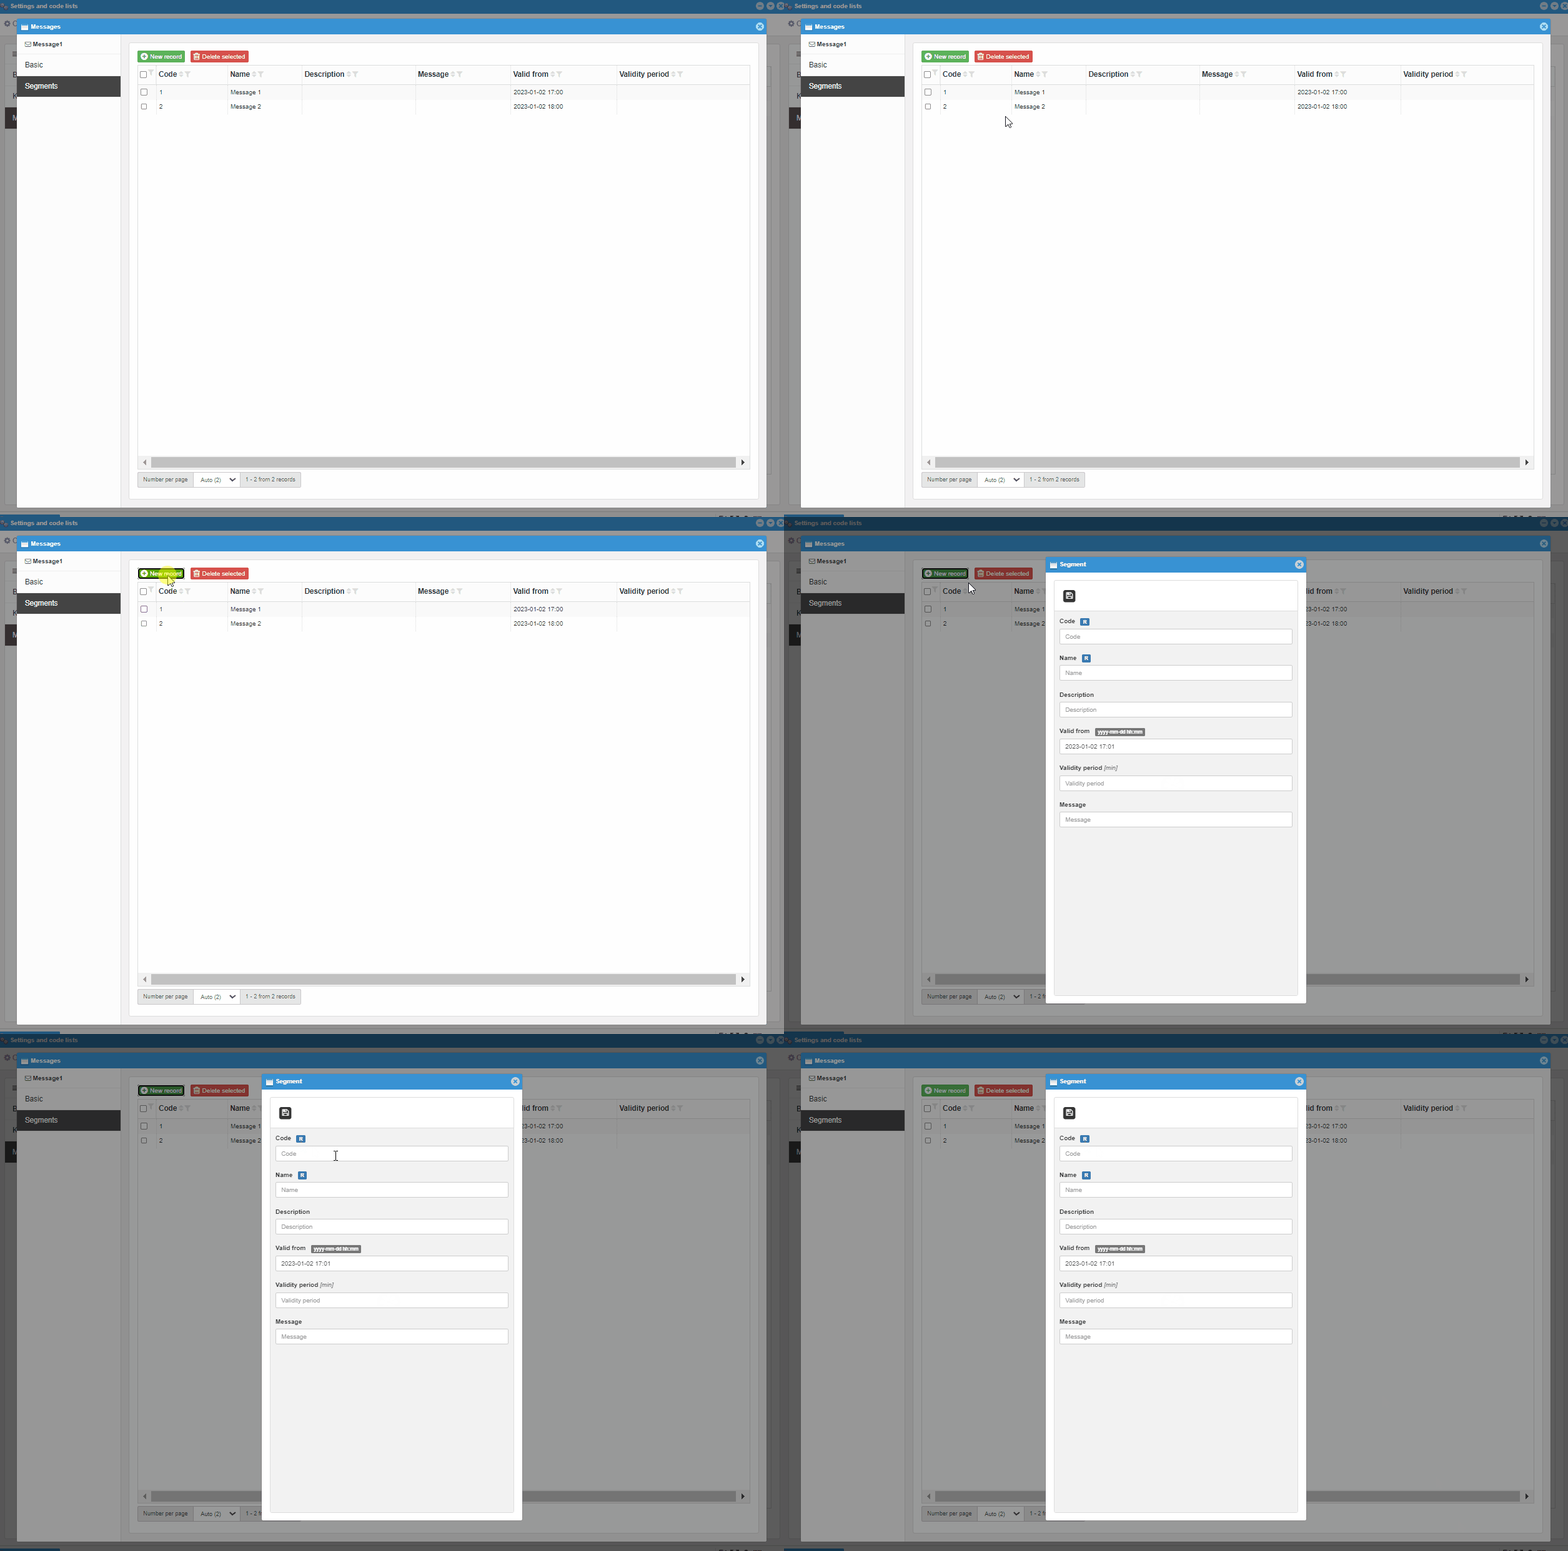
# Message
The screen allows you to name the message group setting per reader so that, in the case of multiple readers, these settings can be distinguished. When creating a code list of messages, the Name is required and must be filled in. The note serves to supplement the naming.
BasicNameDescription
SegmentsNew recordDelete selected
# Message segment - message
The name, validity and the text of the message itself are recorded in the segment.
CodeNameDescriptionValid fromValidity periodMessage
# Type readers ZK
In the case of a ZK type reader, the menu is used for Proface and Speedface readers, or even for iClock S880. Settings and usage of Interrupts, keys and messages are different depending on the type of reader, i.e. ProFace/SpeedFace and iClock S880.
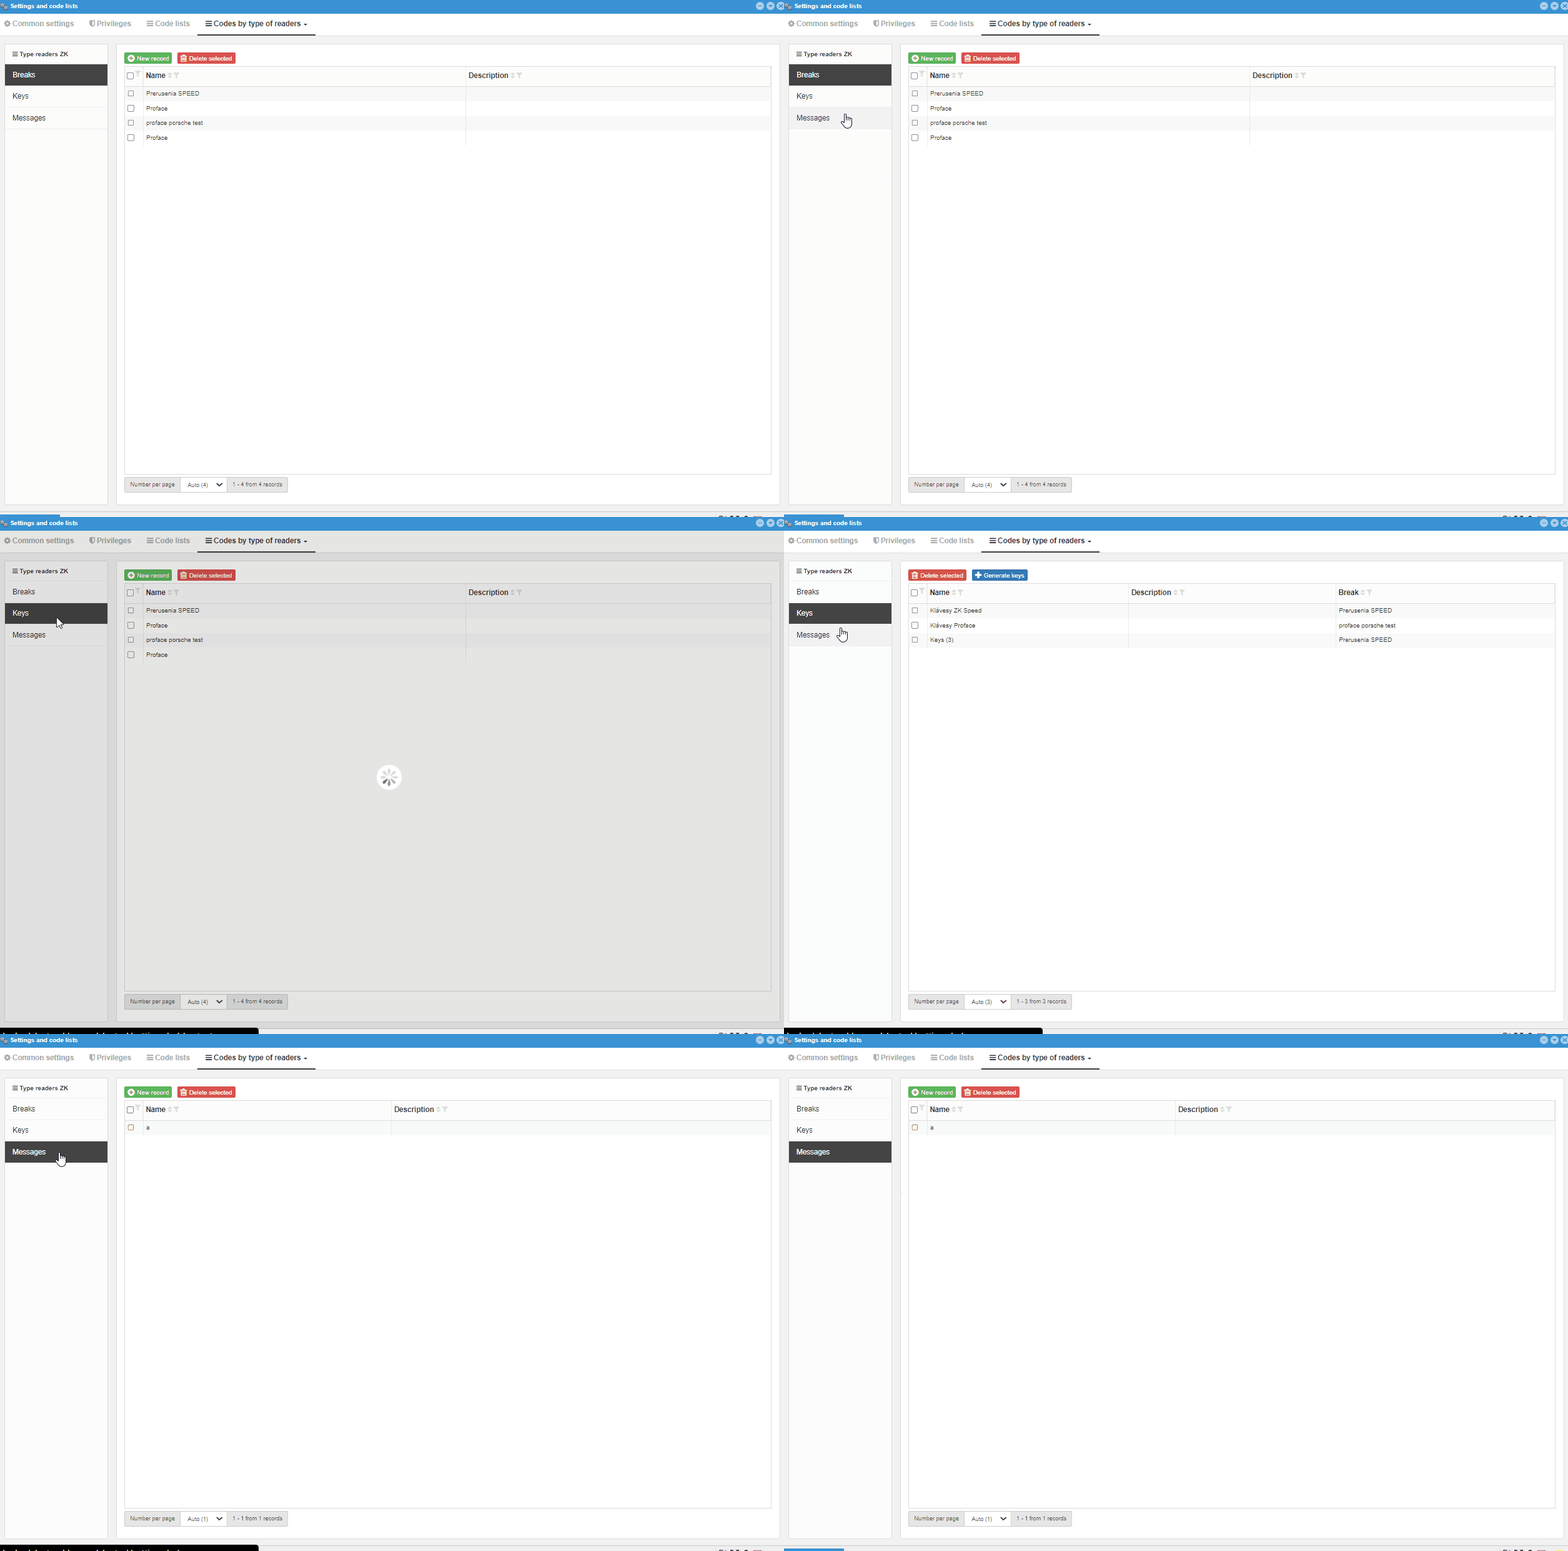
# Breaks
New recordDelete selected
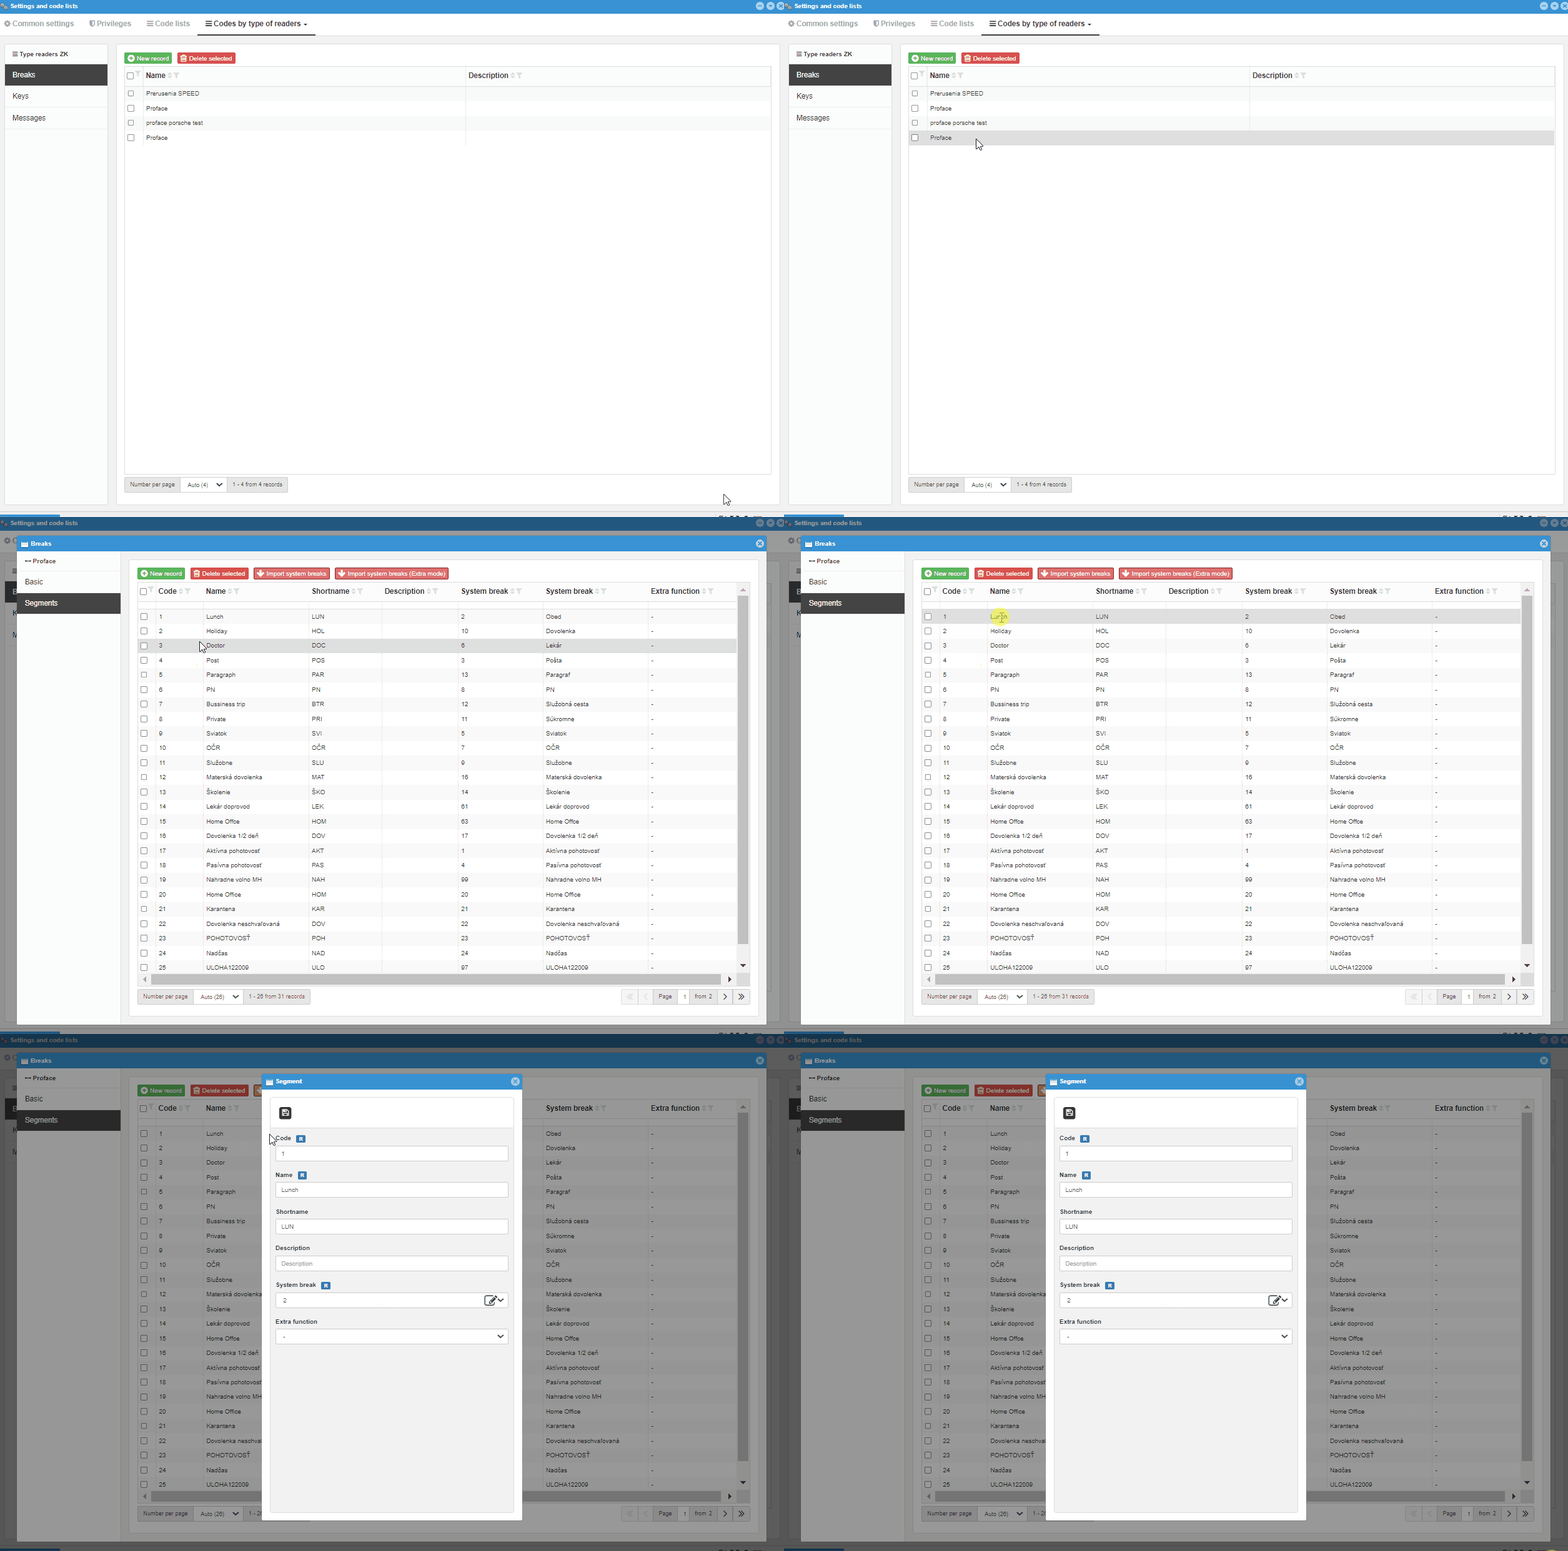
# Basic
The screen allows you to name the break setting per reader so that the settings can be distinguished in the case of multiple readers. When creating the break code list, the Name data is required and must be filled in. The note serves to supplement the naming.
NameDescription
# Segments
New recordDelete selectedImport system breaks- imports system breaksImport system breaks (Extra mode)- creates an arrival and departure, imports system breaks with departure marking for the given break
Note
It is best to generate for:
- S880 - normal breaks
- ProFace/SpeedFace - breaks in extra mode
# Interrupt Segment - Interrupt
After creating the break code, you still need to create breaks and modify their settings. Since the break settings in webPatrol are tied to system breaks, there is an option to import system breaks. Arrival and departure from work can also be set.
CodeNameShortnameDescriptionSystem break- assigning a system break to a given segmentExtra functionCheck inCheck outCheck in from breakCheck out to breakPass INPass OUT
# Keys
- Delete selected
- Generate keys - creates a group of keys that we can then set and send to the reader
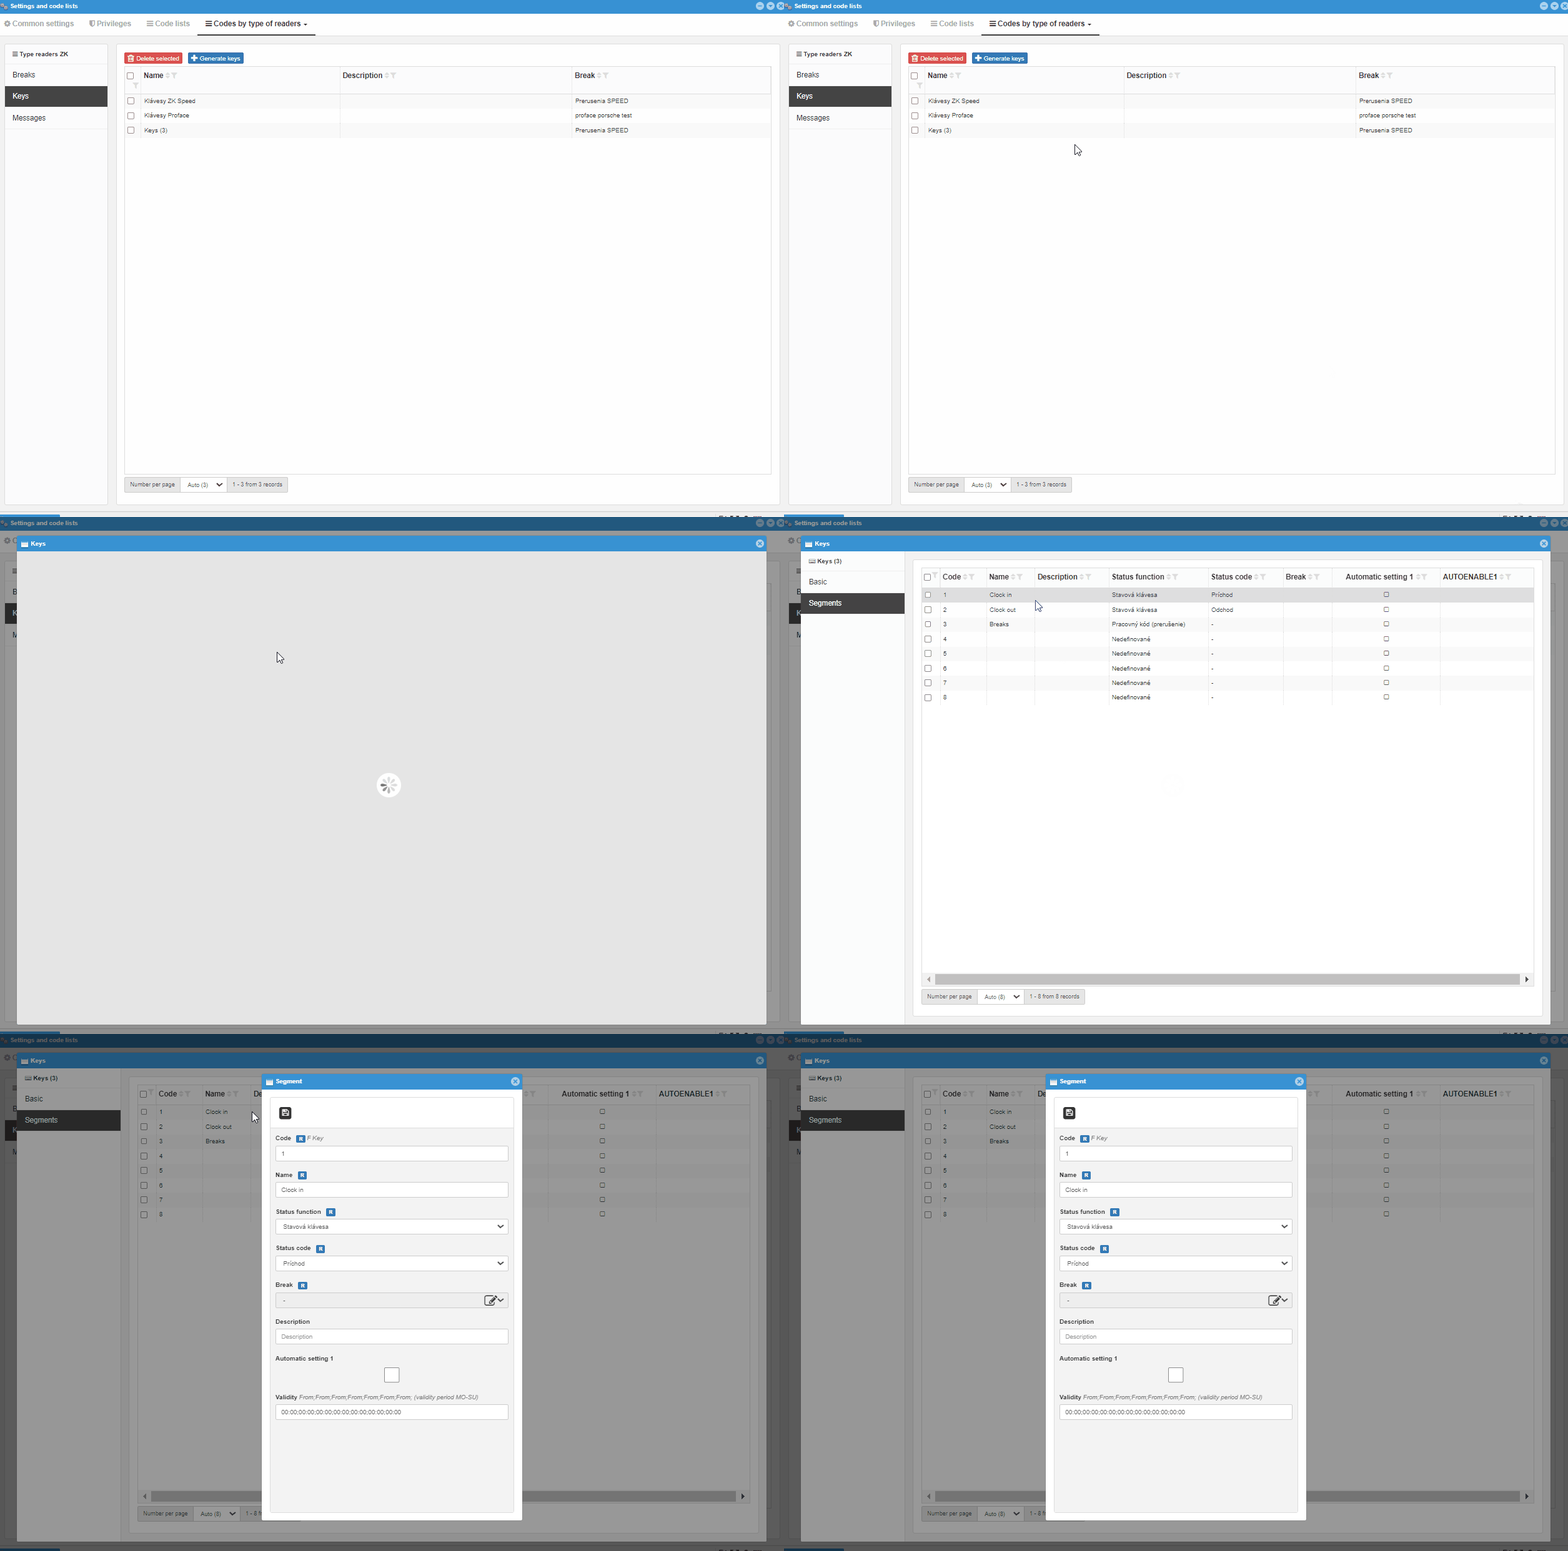
# Basic
ProFace/SpeedFace readers do not need to be set under preset conditions, just generate. It is still possible to adjust the options, but it is also necessary to set the reader manually. For readers of the S880 type, the generated keys are essential, since only through their menu is the choice of which transaction is sent.
NameDescriptionBreak- selection of a group of breaks from the code list according to the type of readers ZK Interruptions
# Segments
During generation, in this case, 8 keys are created. They can neither be deleted nor new ones created. For ProFace/SpeedFace, only Enter, Exit and Interrupt selection are usable, so there is no need to set more than three keys. In the case of the S880, every key can be used, including the status function - message.
# Key segment - key
NameStatus functionUndefined- is not displayedStatus key- allows you to send a status codeWork code (break)- allows you to select a status code and assign an breakMessage- displays a message to an authenticated user
Status codeCheck in- sends arrival to work, or arrival from break, if it is assigned - it is necessary to select the break with which the arrival will be associatedCheck out- it is necessary to select the break with which the exit will be connectedStart of action- possible selection of action as breakEnd of action- possible selection of action as breakPass IN- passing through the doorPass OUT- passing through the doorFood - ordering- after selecting the order (instead of interrupting) and verifying the user, the order is sentFood - cancelling- reservedFood - putting in the bourse- reservedFood - selecting from the bourse- reservedFood - dispensing- dispense of the current orderFood - verified- reservedPatrol- reserved
Break- selecting an break from a linked group of breaks, through the basic settingsDescriptionAutomatic setting 1- if it is clicked, it automatically presets (displayed in the status function Selection and sent during verification) according to the validity settingsValidity- It is set at what time it should be applied, on Mon-Sun
# Messages
Messages can only be used in S880 readers.
New recordDelete selected
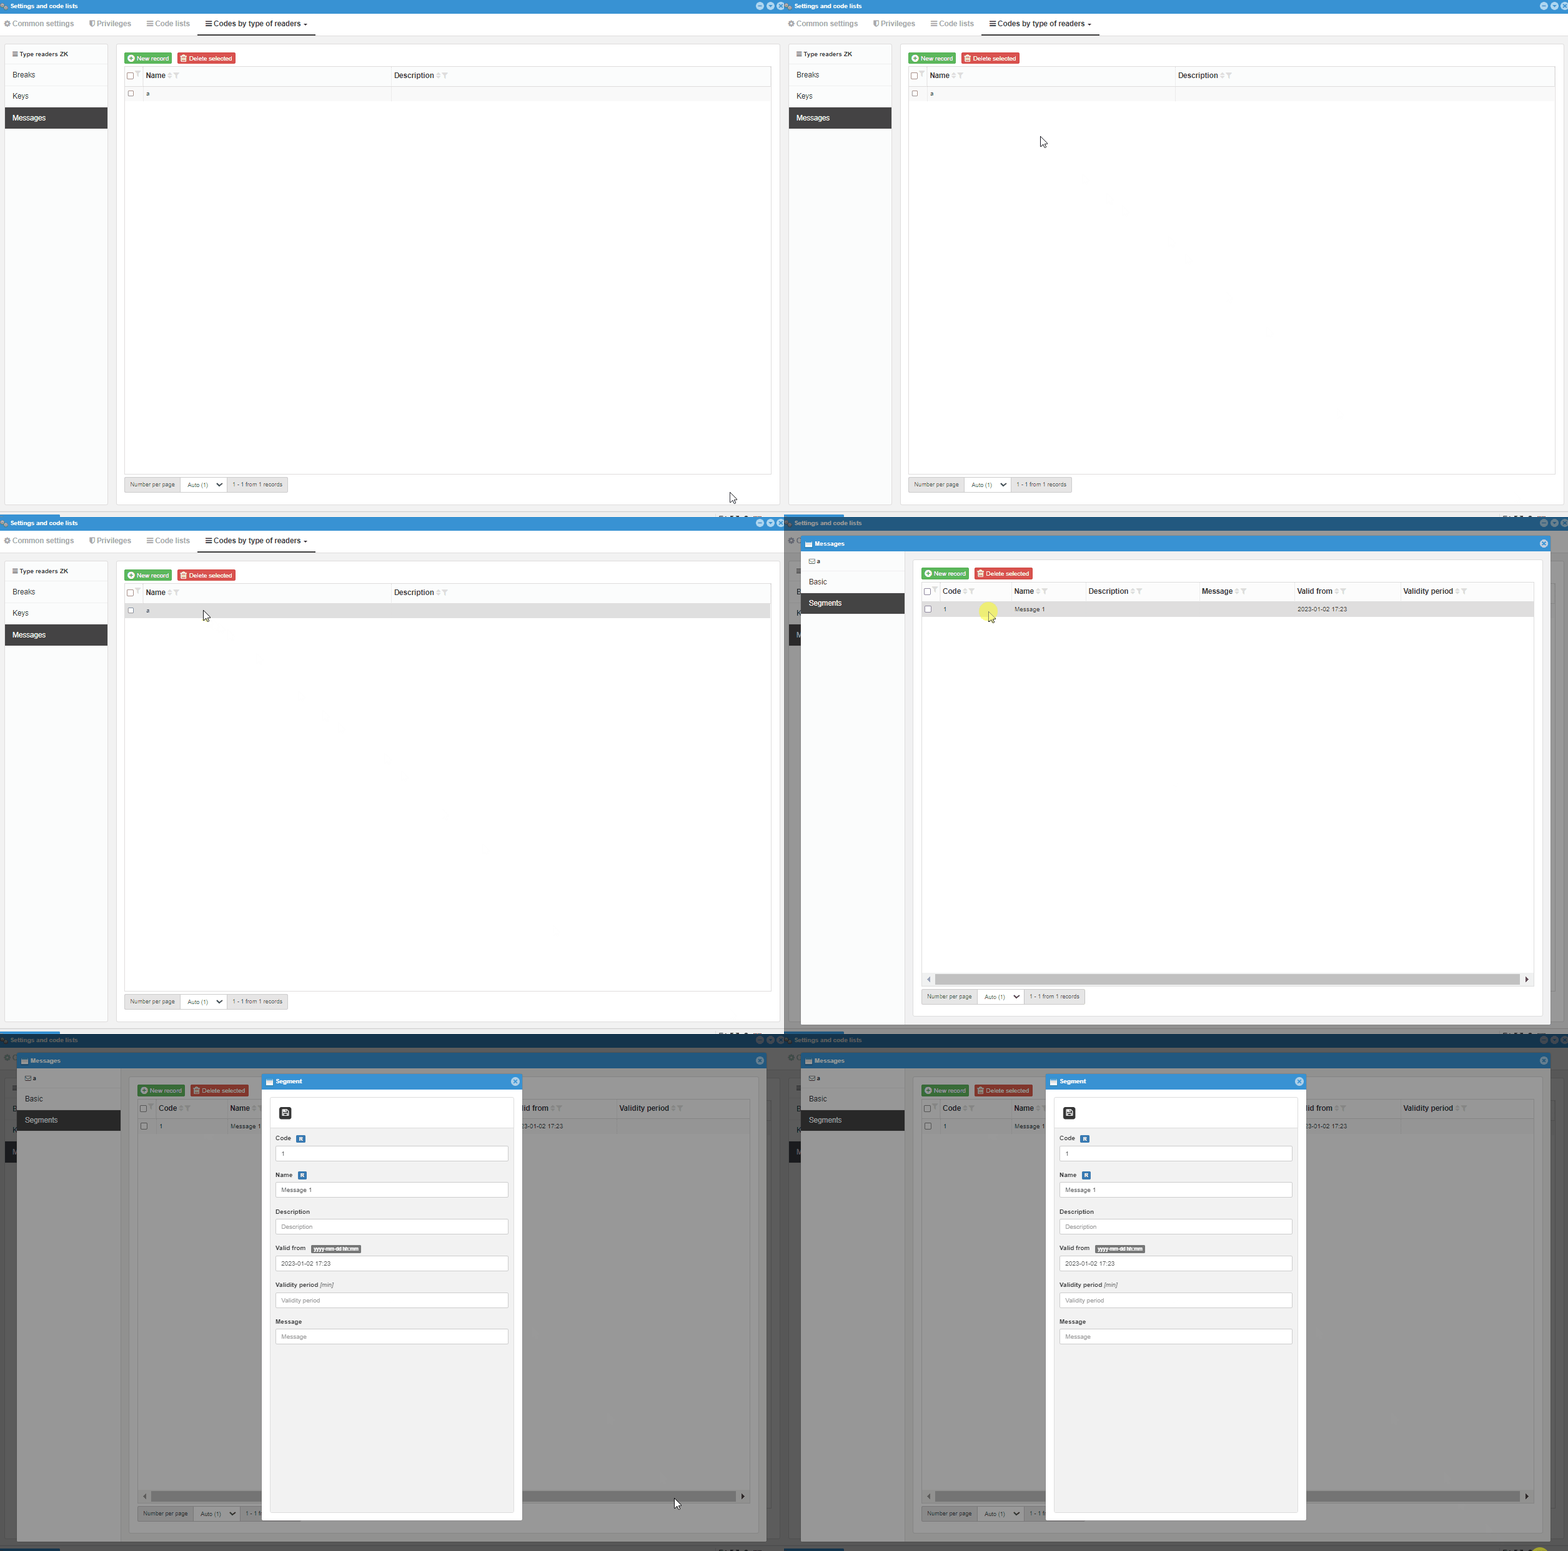
# Basic
NameDescription
# Segments
New recordDelete selected
# Message segment - message
CodeNameDescriptionValid from- date and time from which the user will be able to read the messageValidity period- how long the message will be displayed after openingMessage
# Type readers ZK ACP
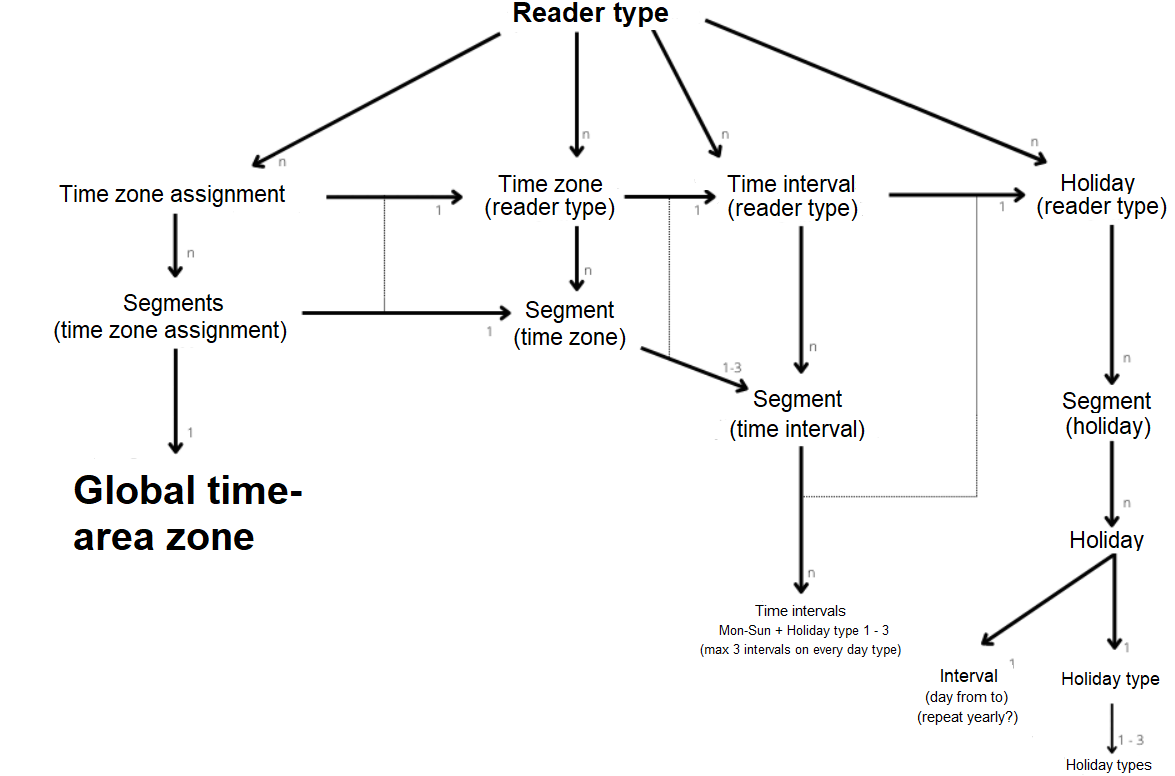
Sensors of the ZK ACP type are used as access readers, so it is more important when which person can enter where. There are therefore adjustable time zones in the code lists of this type of reader. It is best to start setting holidays, time intervals, time zones, time zone control in global code lists in the opposite direction, and lastly set the time zone assignment.
More about time zones in Time-area zone and time zone by reader type
# Time zones assignment
New recordDelete selected
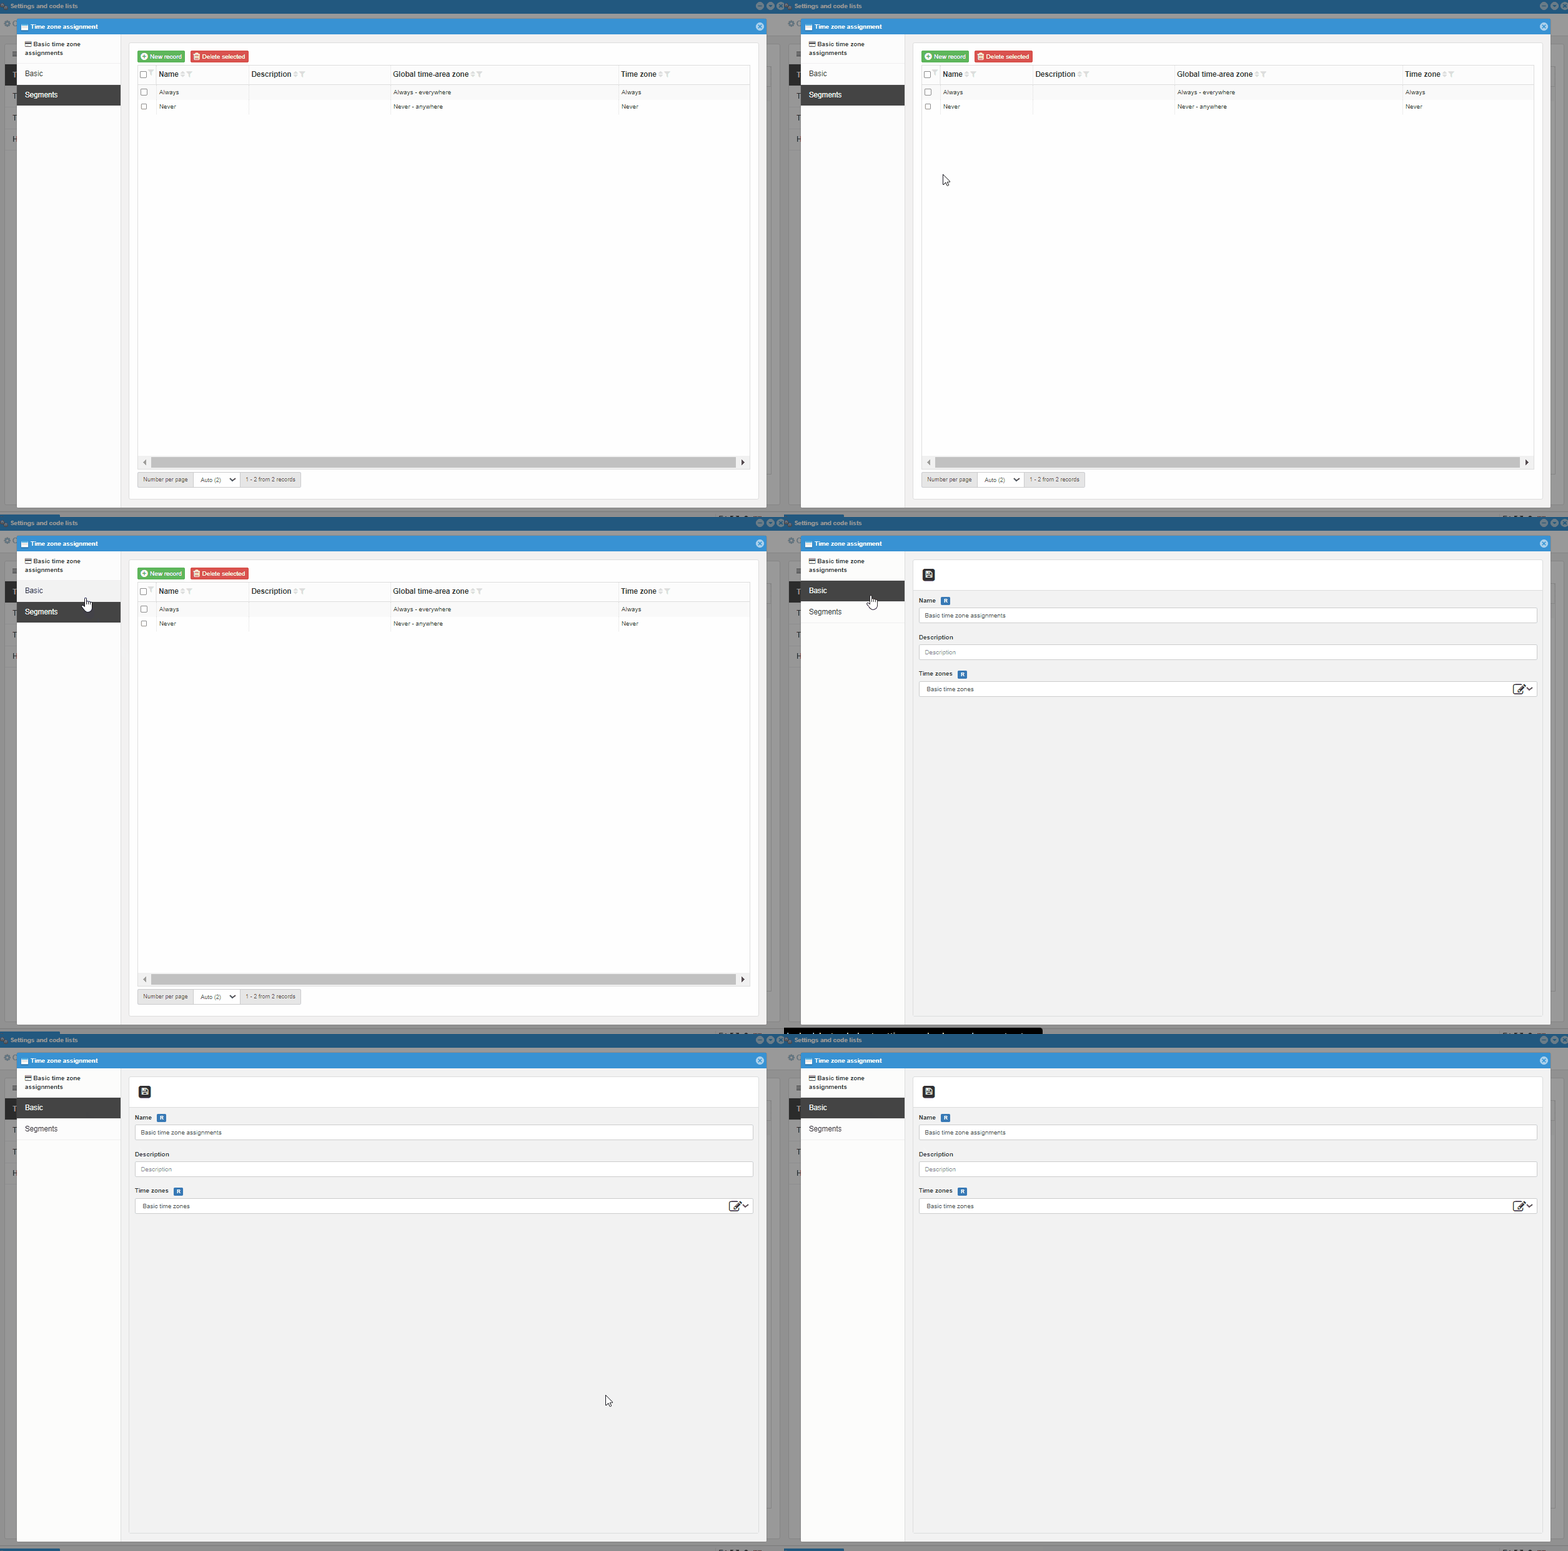
# Basic
NameDescriptionTime zones- Groups of time zones are selected from the list of time zones during which the user is allowed to enter
# Segments
New recordDelete selected
# Time zone assignment segment - time zone assignment
Exist
NameDescriptionGlobal time-area zone- výber globálnej časovo-priestorovej zóny, základnej, alebo užívateľom vytvorenejalways-everywherenever-nowhereundefined
Time zone- selecting a segment from the assigned time zone
# Time zones
In the time zone, it is possible to allocate a time interval and then use a maximum of 3 segments from it
New recordDelete selected
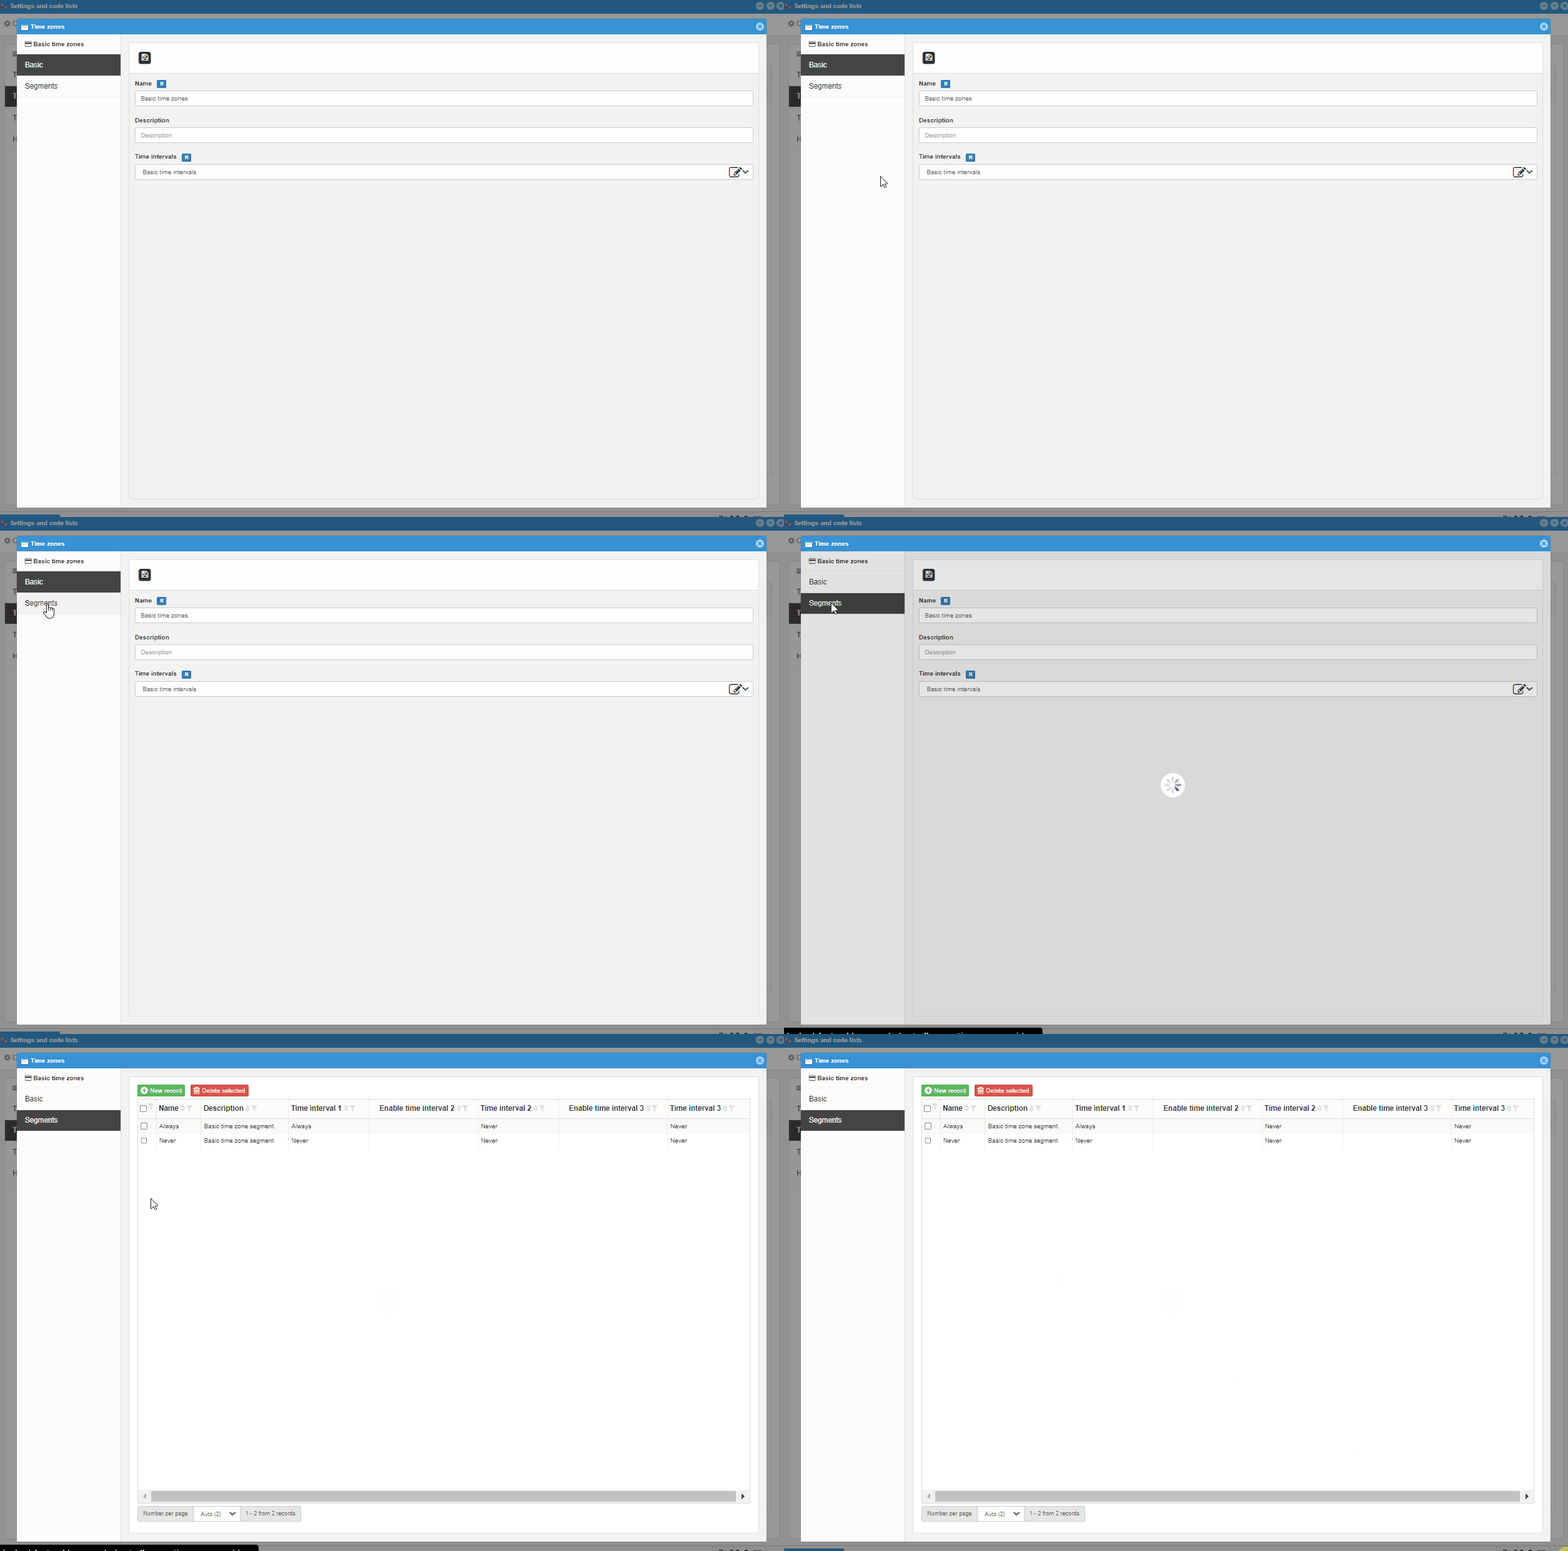
# Basic
NameDescriptionTime intervals- Groups of time intervals are selected from the list of time intervals during which the user is allowed to enter
# Segments
New recordDelete selected
# Time zone segment - time zone
There are basic ones that contain always and never. 0 to 3 time periods of entry authorization for Monday to Sunday and all 3 types of holidays are set here. If multiple time intervals are allowed, their unification occurs.
NameDescriptionTime interval 1- selecting a segment from the assigned time intervalsEnable time interval 2Time interval 2- selecting a segment from the assigned time intervals, if enabledEnable time interval 3Time interval 3- selecting a segment from the assigned time intervals, if enabled
# Time intervals
New recordDelete selected
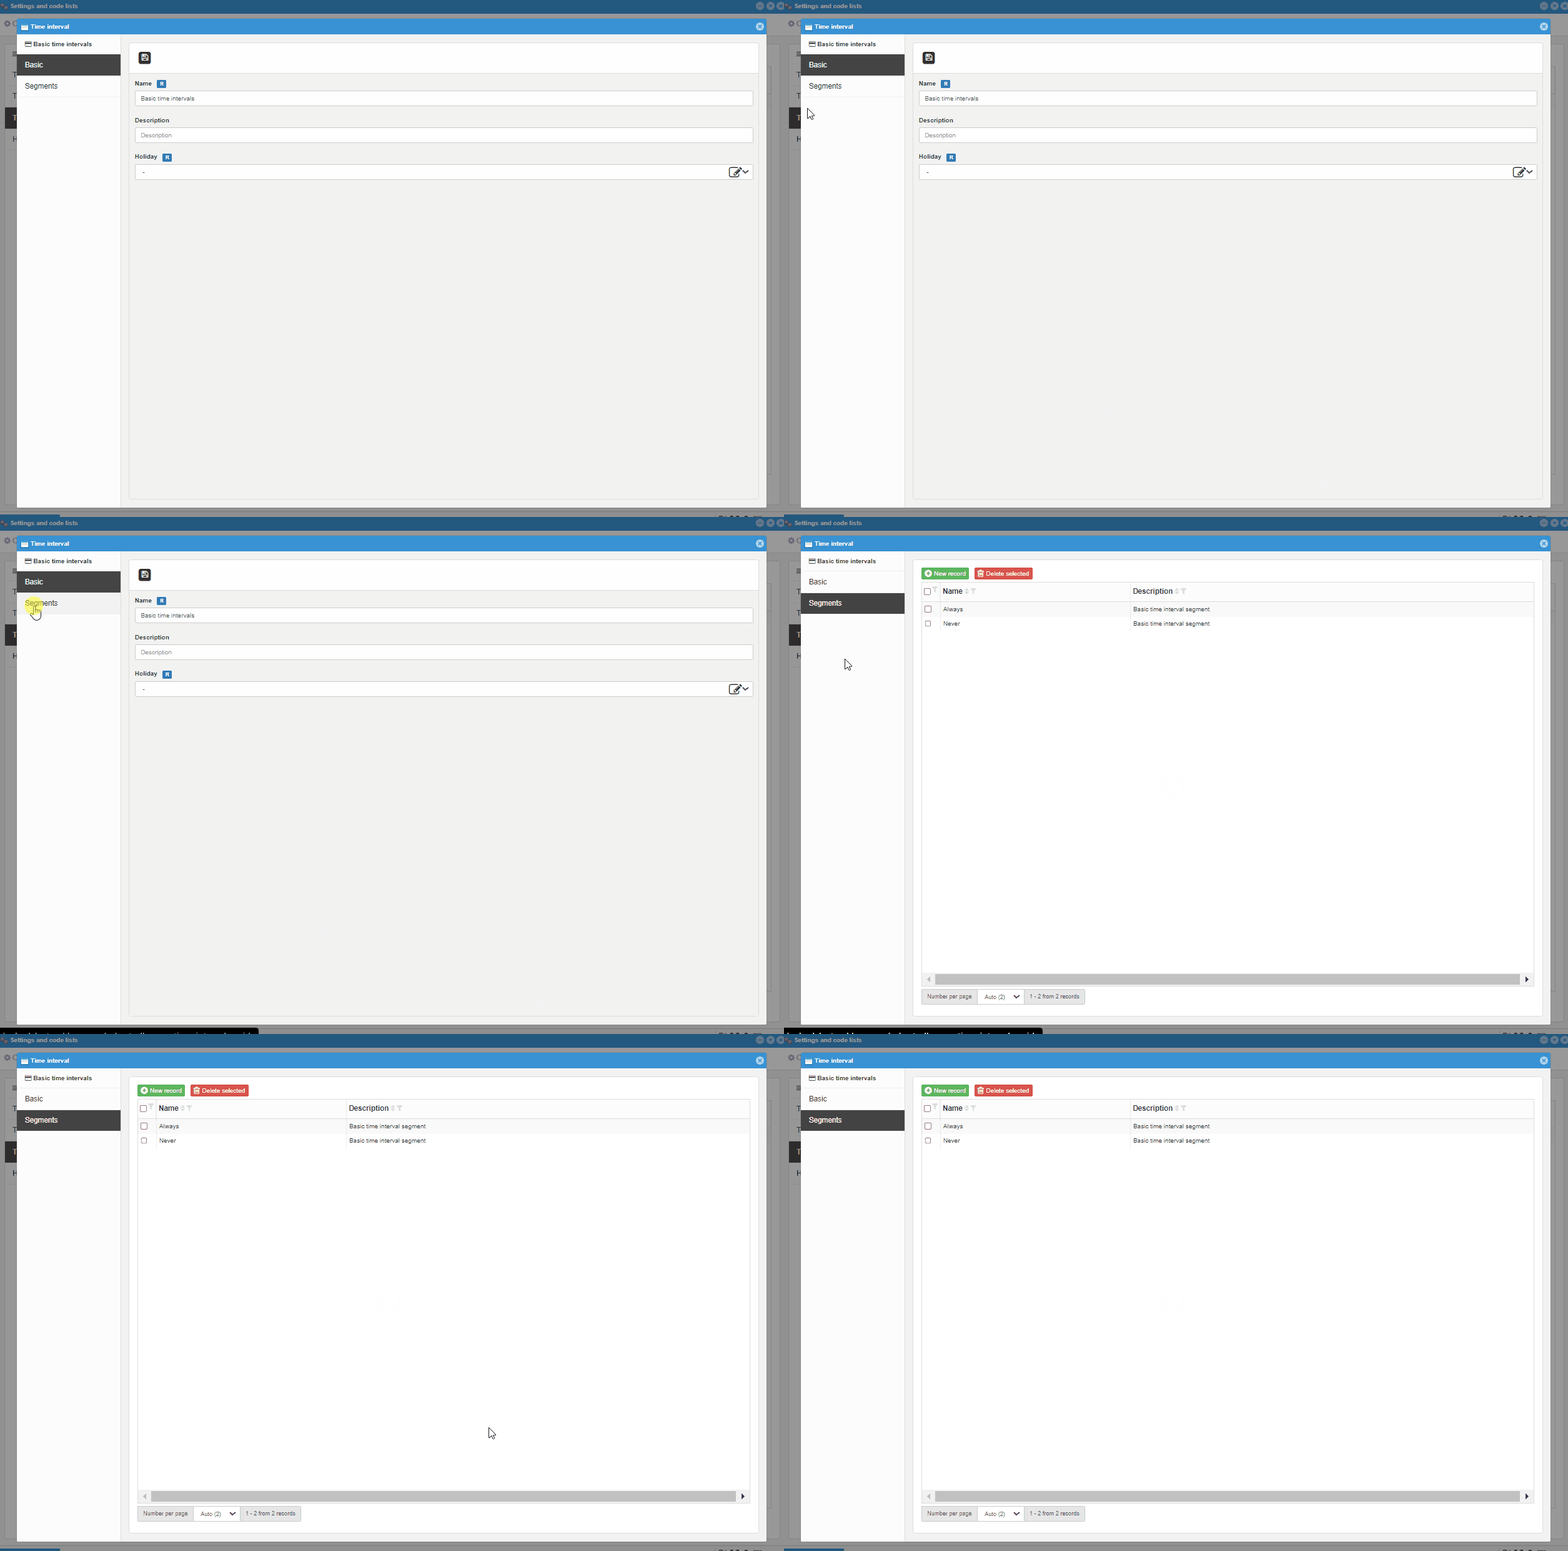
# Basic
NameDescriptionHoliday- A group of holidays is selected from the code list of holidays
# Segments
New recordDelete selected
# Time intervals segment- time interval
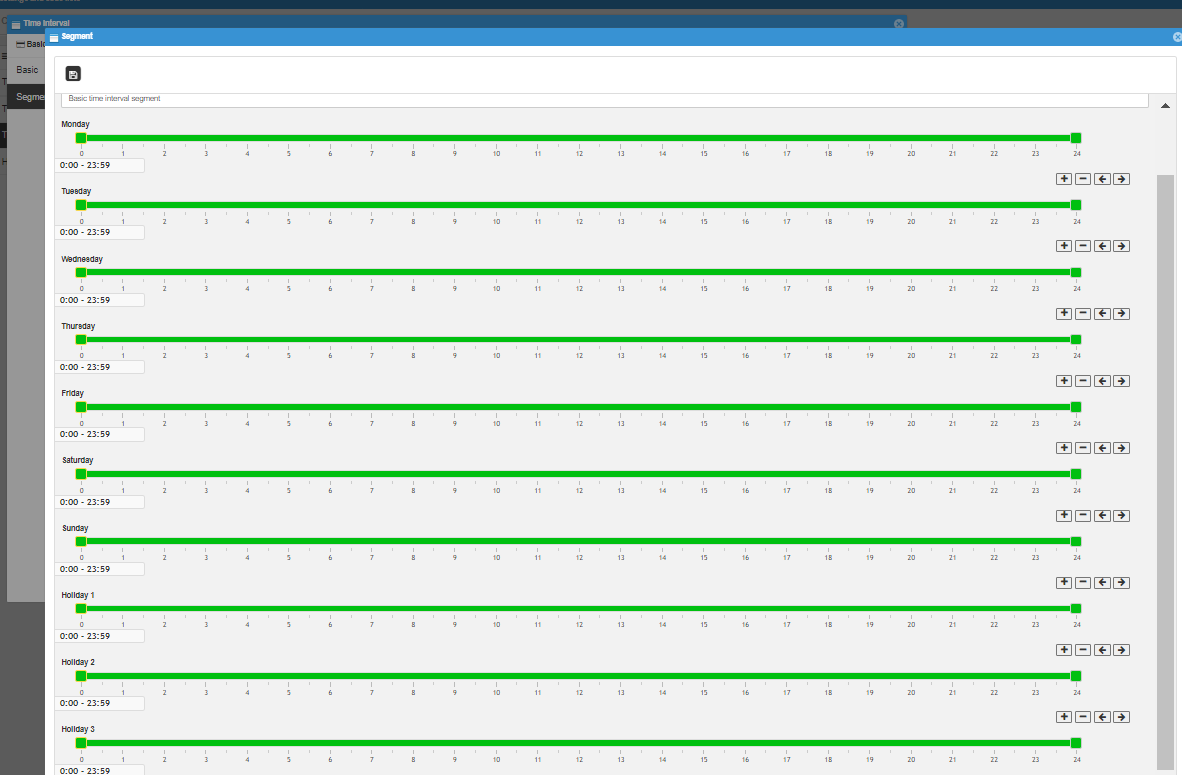
There are basic ones that contain always and never. 0 to 3 time periods of entry authorization for Monday to Sunday and all 3 types of holidays are set here.
NameDescriptionMondayTuesdayWednesdayThursdayFridaySaturdaySundayHoliday 1Holiday 2Holiday 3
# Holidays
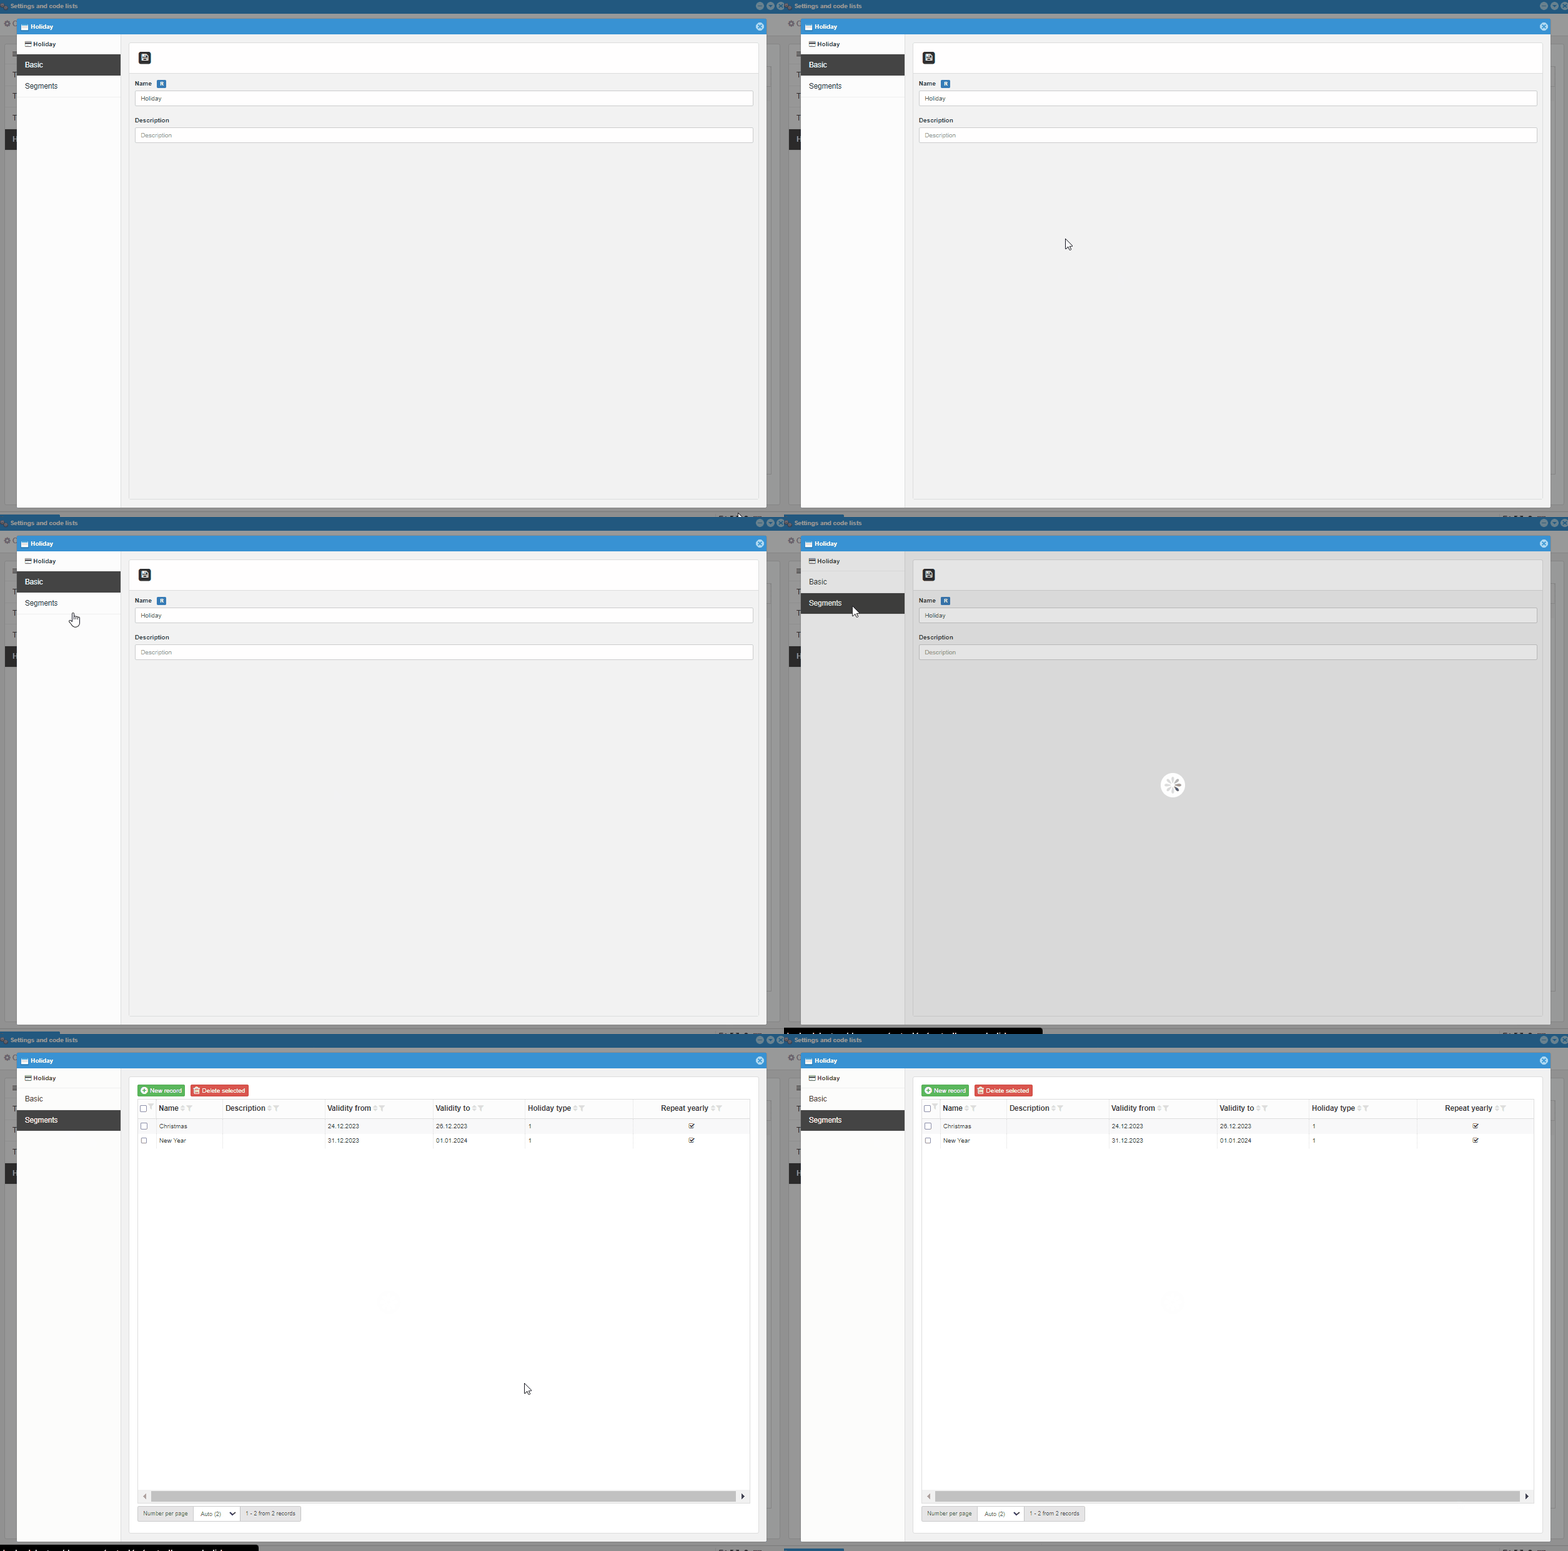
There are groups of holidays, which are further divided into three different types of holidays (adjustable at will).
New recordDelete selected
# Basic
New recordDelete selected
# Segments
New recordDelete selected
# Holiday segment - holiday
The type of holiday is one of 3 groups, divided according to your discretion.
NameDescriptionValid fromValid toHoliday type- 1, 2, 3Repeate yearly
# Time-area zone and time zone by reader type
To create time zones, you first need to:
- create a global variable, time zone name, in the time zone code list
- create and set holidays and divide them into three groups, if we want to be able to enter the premises in a different time interval in each type of holiday
- create time intervals to which holidays will be assigned (if we use them), set time intervals as needed, maximum 3 for one day
- create time zones that will use segments of the assigned time interval, a maximum of 3
- create a time zone mapping where we set up a connection between the name and the time zone of the reader type, in which we then use the segments of the given time zone of the reader type